Froggy camouflage handheld fans

Project by Anna Carreras. BAU Design College of Barcelona, Spain.

Hand fan (abanico) inspired by a glass frog. Photo by Anna Carreras. Gamboa, Panama.

Rainforests of Panama are some of the world’s most biologically diverse areas. Animals use camouflage tactics to blend in with their surroundings, to disguise their appearance. They mask their location, identity, and movement to avoid predators.

By the other hand in cities in many countries the increased use of surveillance technologies have become part of the public and private landscape. Citizens lack of camouflage tactics to avoid these forms of elevated vigilance. Can we learn and borrow tactics from animals to keep away from this constant monitoring?

The froggy camouflage handheld fans project proposes a playful way to act upon our surveying world while learning from frogs camouflage in Gamboa rainforest, Panama.

Hand fan inspired by a dart frog. Photo by Anna Carreras. Gamboa, Panama.

Nature in Gamboa

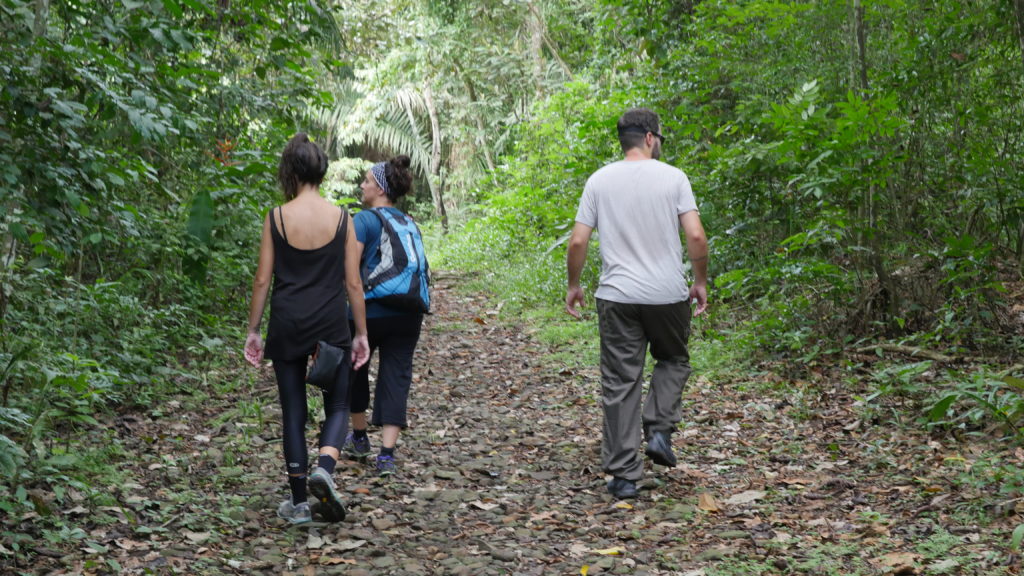
Exploring nature, animal watching in Laguna Trail. Photo by Marta Verde. Gamboa, Panama.

Attending the Digital Naturalism Conference (Dinacon) from August 26th to September 1st offered the possibility to do several exploratory walks around Adopta un Bosque station, La Laguna trail in Gamboa and Pipeline road on the border of the Soberania National Park. Animal watching includes birds (thank you Jorge), frogs, mammals and several butterflies and insects.

Bat sleeping place near the Panama Canal. Photo by Marta Verde. Gamboa, Panama.

A species’ camouflage depends on the physical characteristics of the organism, the behavior of the specie and is influenced by the behavior of its predators. Background matching is perhaps the most common camouflage tactic and animals using this tactic are difficult to spot and study. Another camouflage tactic is disruptive coloration that causes predators to misidentify what they are looking at. Other species use coloration tactics that highlight rather than hide their identity. Warning coloration makes predators aware of the organism’s toxic or dangerous characteristics. This type of camouflage is called aposematism or warning coloration.
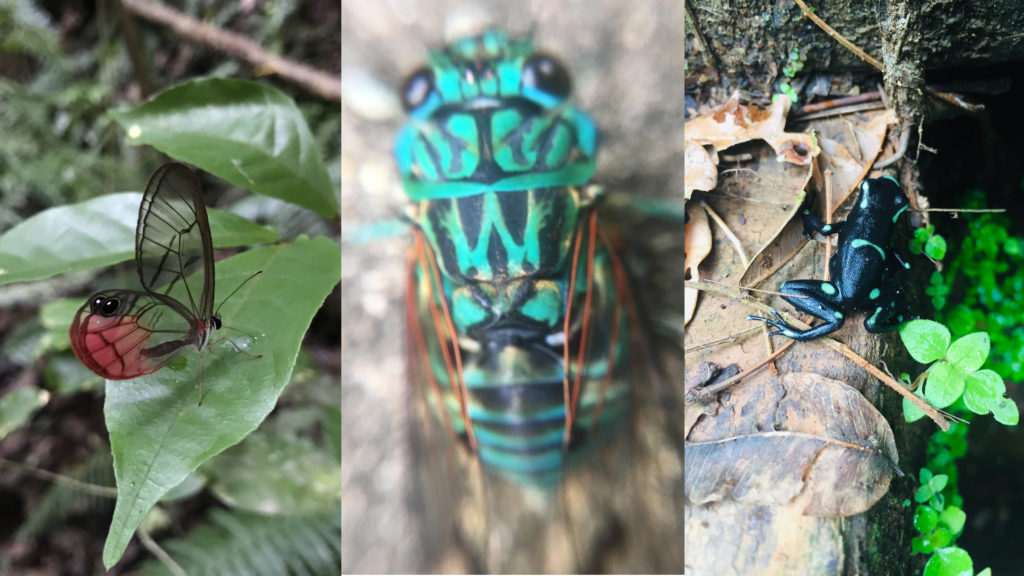
Animals with different camouflage tactics. Photos by Mónica Rikić, Marta Verde and Tomás Montes. Gamboa, Panama.

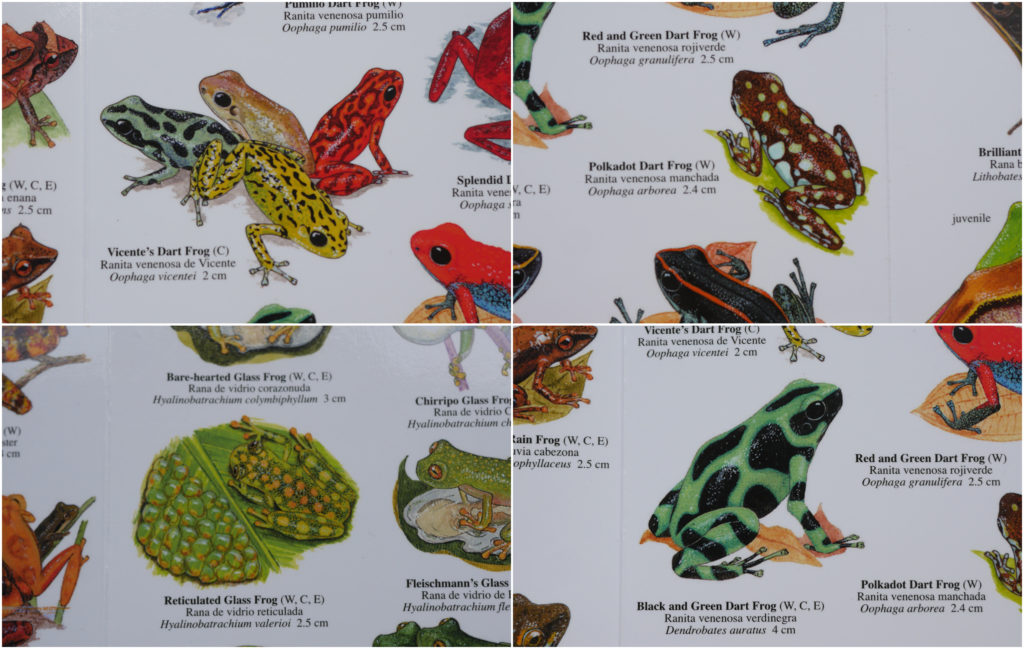
Studding camouflage tactics includes animal observation and some readings. Frogs are easier to spot and photograph in Gamboa than insects or snakes. The animal books at Adopta un Bosque station and Dinalab gave the opportunity to classify the different species and gain some knowledge about their colors and skin patterns.
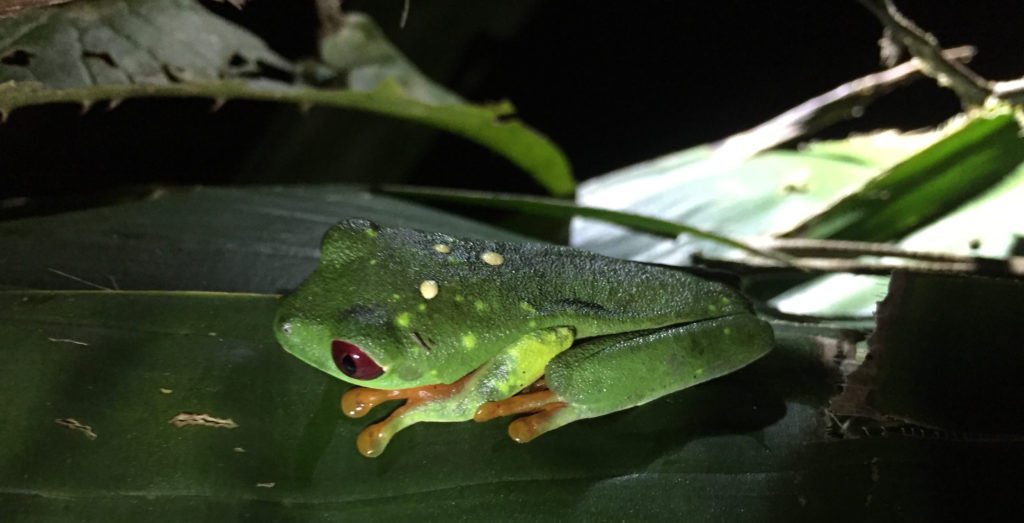
Frog spotted and photographed during Pipeline road walk. Photo by Tomás Montes. Gamboa, Panama.
Frogs spotted and photographed during walks. Photos by Tomás Montes, Päivi Maunu, Jorge Medina and Tomás Montes. Gamboa, Panama.
Frog identification triptych at Dinalab. Photos by Anna Carreras. Gamboa, Panama.
Frog identification book at Adopta un Arbol station. Photos by Anna Carreras. Gamboa, Panama.

Patterns

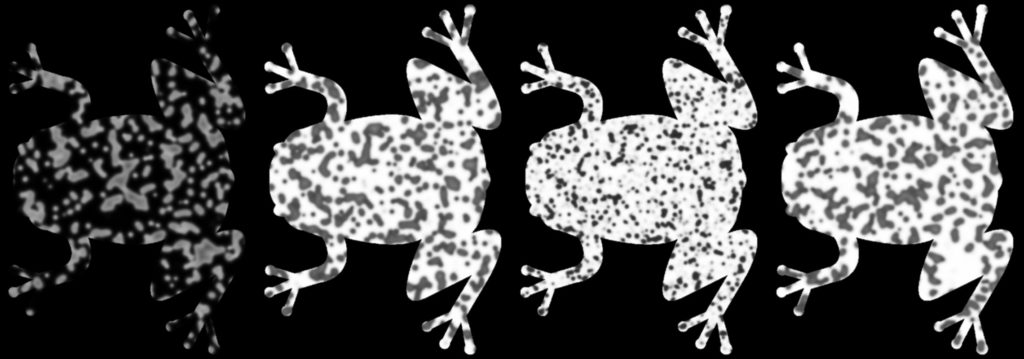
Different frog skin patterns generated mathematically. Images and code by Anna Carreras.

The skin of some animals show a self-ordered spatial pattern formation. Cell growing and coloration creates some order resulting from the specific differentiation of cell groups. In such complex systems cells are only in contact with their closest neighbors. Which are this morphogenesis mechanisms where some order emerges from individual cells? Which are the mathematical models we can use to achieve this kind of growing patterns and gain some knowledge about them? Can we simulate some frog’s skin visible regularities with a coded system?

The mathematician Alan Turing predicted the mechanisms which give rise to patterns of spots and stripes. The model is quite simple, it places cells in a row that only interact with their adjacent cells. Each cell synthesizes two different types of molecules. And this molecules can diffuse passively to the adjacent cells. The diffusion process makes the system and the whole result more homogeneous. It tends to destroy any ordered structure. Nevertheless the diffusion process with some interaction by the cell molecules drives to macroscopic ordered structures. The mechanism is called reaction–diffusion system. It drives the emergence of order in a chaotic dynamic system.

Steps of a reaction-diffusion model evolving from chaotic randomness to structured patterns. Images by Anna Carreras
Steps of a reaction-diffusion model evolving from chaotic randomness to structured patterns. Images by Anna Carreras.
Steps of a reaction-diffusion model evolving from an organized grid to emergent patterns. Images by Anna Carreras.

Code and interface

Frog pattern generator using a reaction-difussion system. Image and system by Anna Carreras.

A system using the Gray-Scott model and formulas was coded in Processing language. The interface shows the animation of how a frog skin evolves. The GUI also shows the system values that lead to that skin pattern formation. These values and two selected colors generate a unique frog pattern each time the system is started. The spatial feeding system options and the values that can be selected and adjusted are inspired by Gamboa’s frogs. They derive from the observed and photographed species and from the consulted books.
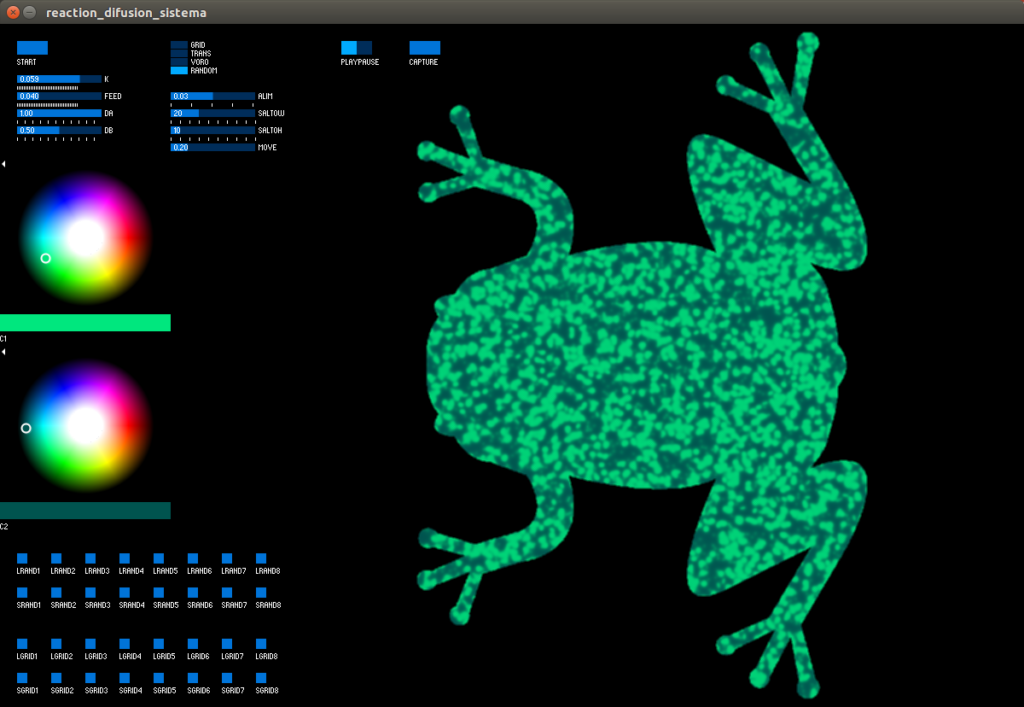
Frog pattern generator using a reaction-difussion system with random feeding. Image and system by Anna Carreras.

Camouflage DIY hand fans

Two different hand fans. Photos by Anna Carreras. Gamboa, Panama.

Frog skin images are used to create light folding hand fans. They are suitable for Gamboa’s hot weather and help to camouflage inside the rainforest. They can easily be taken home and used around the world in several cities.

To build the hand fans two parts are needed: the fan frame and the fan leaf. The designed DIY hand fan is designed as a traditional Spanish hand fan. The frame structure is made of a thin material that can be waved back-and-forth, birch tree or pear tree wood.

Traditional Spanish hand fan structure for laser cut. Designed dxf file by Anna Carreras.

The produced hand fans use 0.8mm thick birch wood to make sure it can bend without breaking. The fabrication starts laser cutting the 16 fan ribs for the frame and printing the camouflage image. Cut the fan leaf, using scissors, as a half circle measuring 210mm the exterior radius and 95mm the inner radius.
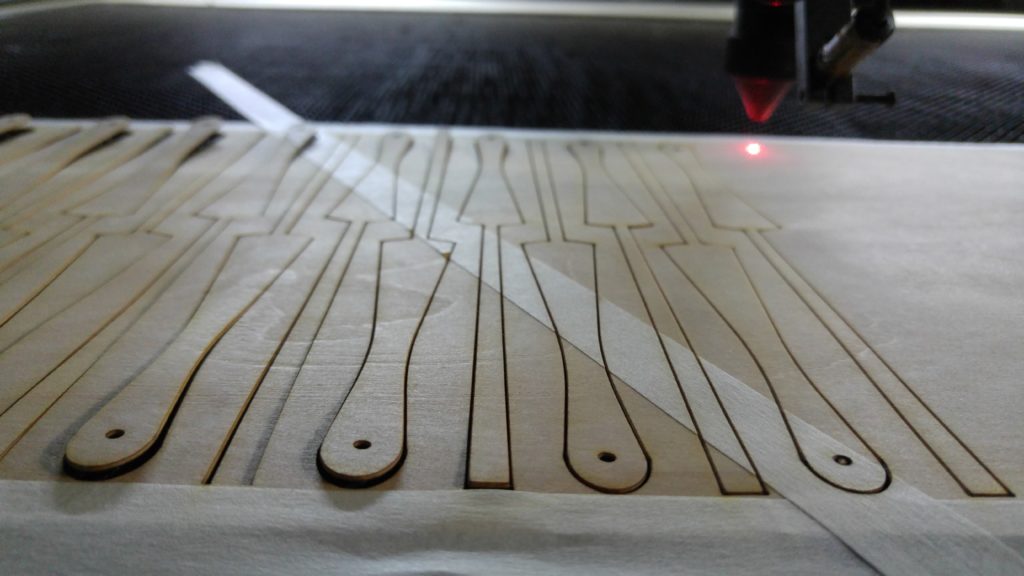
Laser cutting the hand fan ribs structure. Photo by Anna Carreras.

When the parts are ready put together the 16 fan ribs, one wide rib at the beginning and one at the end. Fix the fan ribs with a m3 screw and nut, a metric screw with nominal diameter of 3mm or 0.12in. Extend the fan ribs as an opened hand fan. Glue the fan leaf on the thiner exterior part of each rib and allow the glue to dry. Finally, one rib at a time, put it above the previous ones and fold the paper carefully to create the folding shape.
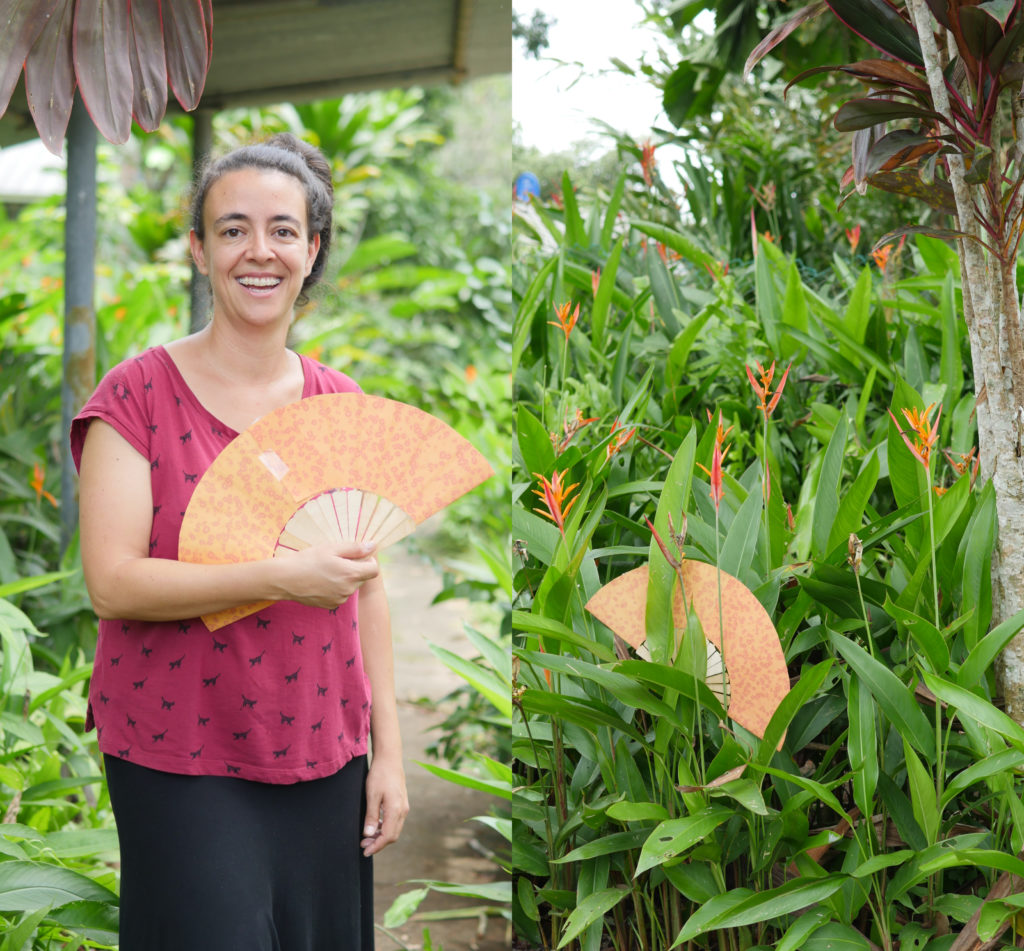
Hand fan in action. Photos by Daniëlle Hoogendijk and Anna Carreras. Gamboa, Panama.
Resulting DIY hand fans. Photos by Anna Carreras. Gamboa, Panama.

Results

Glass frog hand fan. Photo by Anna Carreras. Gamboa, Panama.

Two different models of the Froggy camouflage handheld fans were created. The green one is inspired by the glass frogs and the orange fan is inspired by the pumilio dart frog. Both frogs live in Panama.

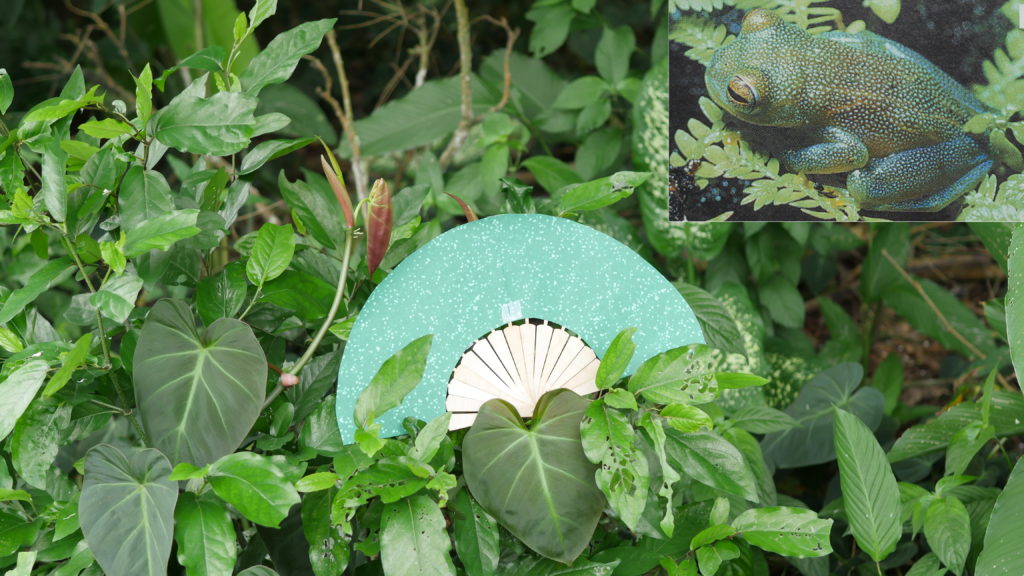
Glass frog and Pumilio dart frog. Photos by Anna Carreras and Pavel Kirillov [CC BY-SA 2.0]. Gamboa and Bocas del Toro, Panama.
Glass frog hand fan. Photo by Anna Carreras. Gamboa, Panama
Pumilio dart frog hand fan. Photo by Pavel Kirillov [CC BY-SA 2.0] and Anna Carreras. Gamboa, Panama

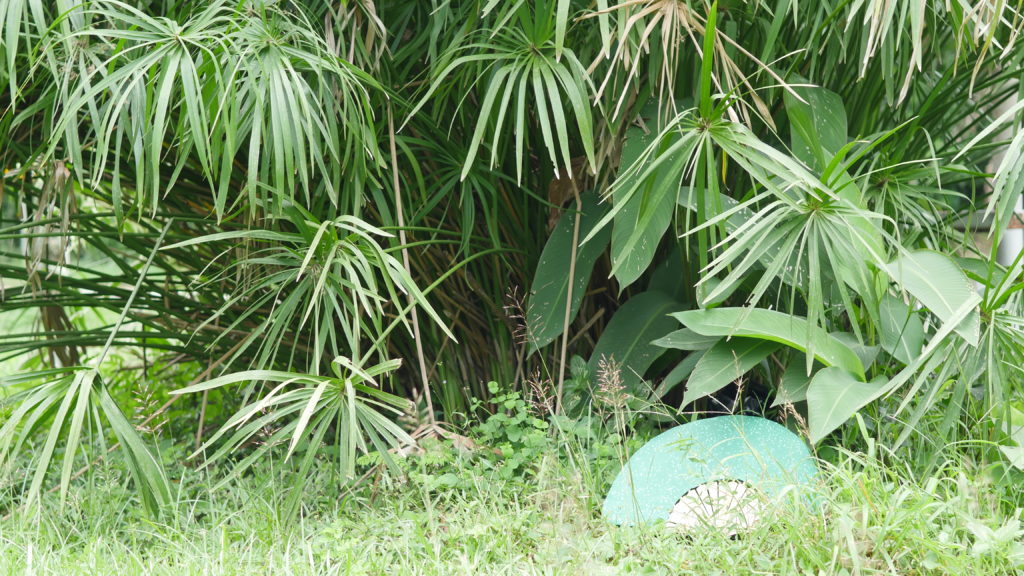
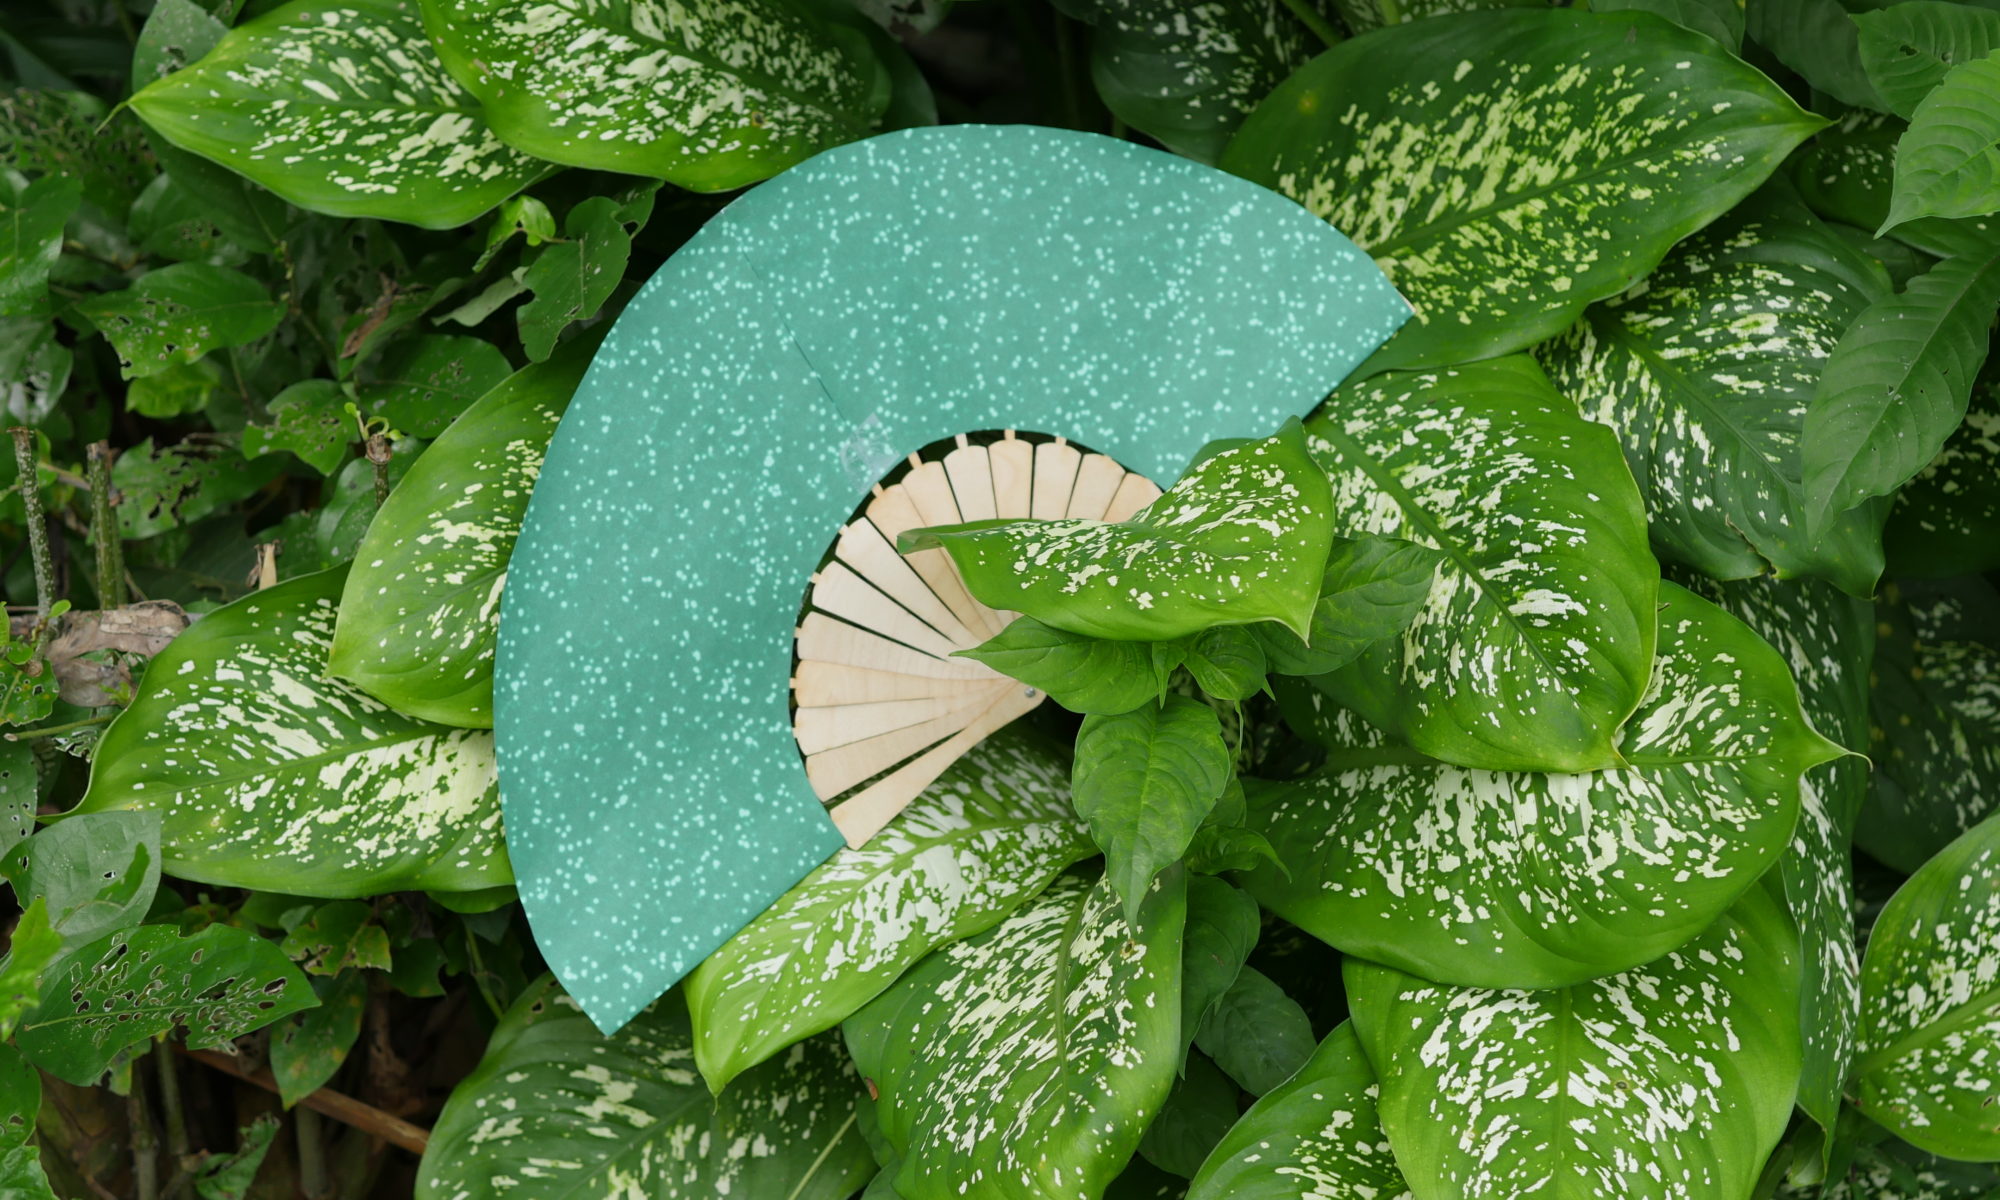
The glass frog handheld fan and the pumilio dart frog handheld fan integrated quite well with Gamboa’s surroundings and the rainforest.

Glass frog hand fan. Photo by Anna Carreras. Gamboa, Panama.
Pumilio dart frog hand fan. Photo by Anna Carreras. Gamboa, Panama.
Glass frog hand fan camouflaged between leaves. Photo by Anna Carreras. Gamboa, Panama.

Conclusions and future work

To  act  upon  our  surveying  world camouflage is one of the plans we can play. It rises issues of mimesis, crypsis, perception, privacy and identity. Some artistic projects about fashion and cosmetics have been developed with this idea, like CV Dazzle and HyperFace, among others. The Froggy camouflage handheld fans project sums up in this direction creating hand fans inspired by Panama’s frogs camouflage strategies.

We can gain some knowledge and learn from animals and their hiding techniques. Some animal camouflage skin coloration can be modeled as a quite simple dynamic system that generates complex ordered patterns. We can mathematically model and code the system to simulate the growing process of frogs skin coloration. It helps us to better understand how different frog species have certain particular patterns. Moreover it gives us some insight about how order can emerge from random initial conditions.

Different animal patterns and camouflage tactics can be further investigated. It can help us to achieve different and diverse algorithms and colored results. They can suit in different environments and they can help us camouflage from the increasing number of surveillance systems. A battle between algorithms learned and borrowed from nature against vigilance algorithms.

Exhibition

Dinalab open Saturday exhibition. Photo by Anna Carreras. Gamboa, Panama.

Acknowledgments

First I would like to thank Dr. Andrew Quitmeyer for organizing the event and all the participants I met at Dinacon Gamboa. And thanks to Marta, Mónica, Tomás, Jorge, Päivi and Dani to help me documenting the work.

References

Book The Chemical Basis of Morphogenesis. Alan Turing. 1952.

Book Orden y Caos en Sistemas Complejos. Ricard V. Solé, Susanna C. Manrubia. 2000.

Videotutorial Coding challenge #13: Reaction Diffusion Algorithm in p5.js. Daniel Shiffman. 2016.

Project CV Dazzle: Camouflage from face detection. 2010.

Project HyperFace: False-Face Camouflage. 2017.
Seedpod LED Hack (Easy, educational bio-augmentation project) – Emily Volk

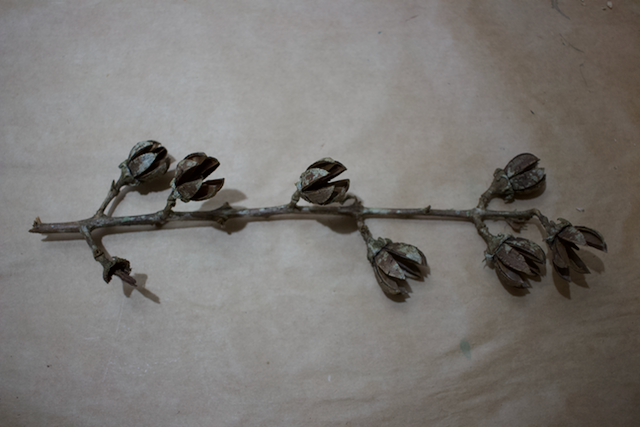
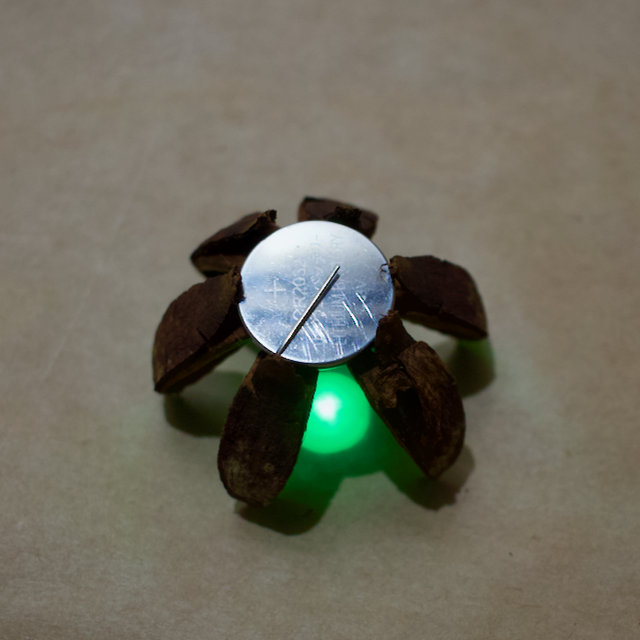
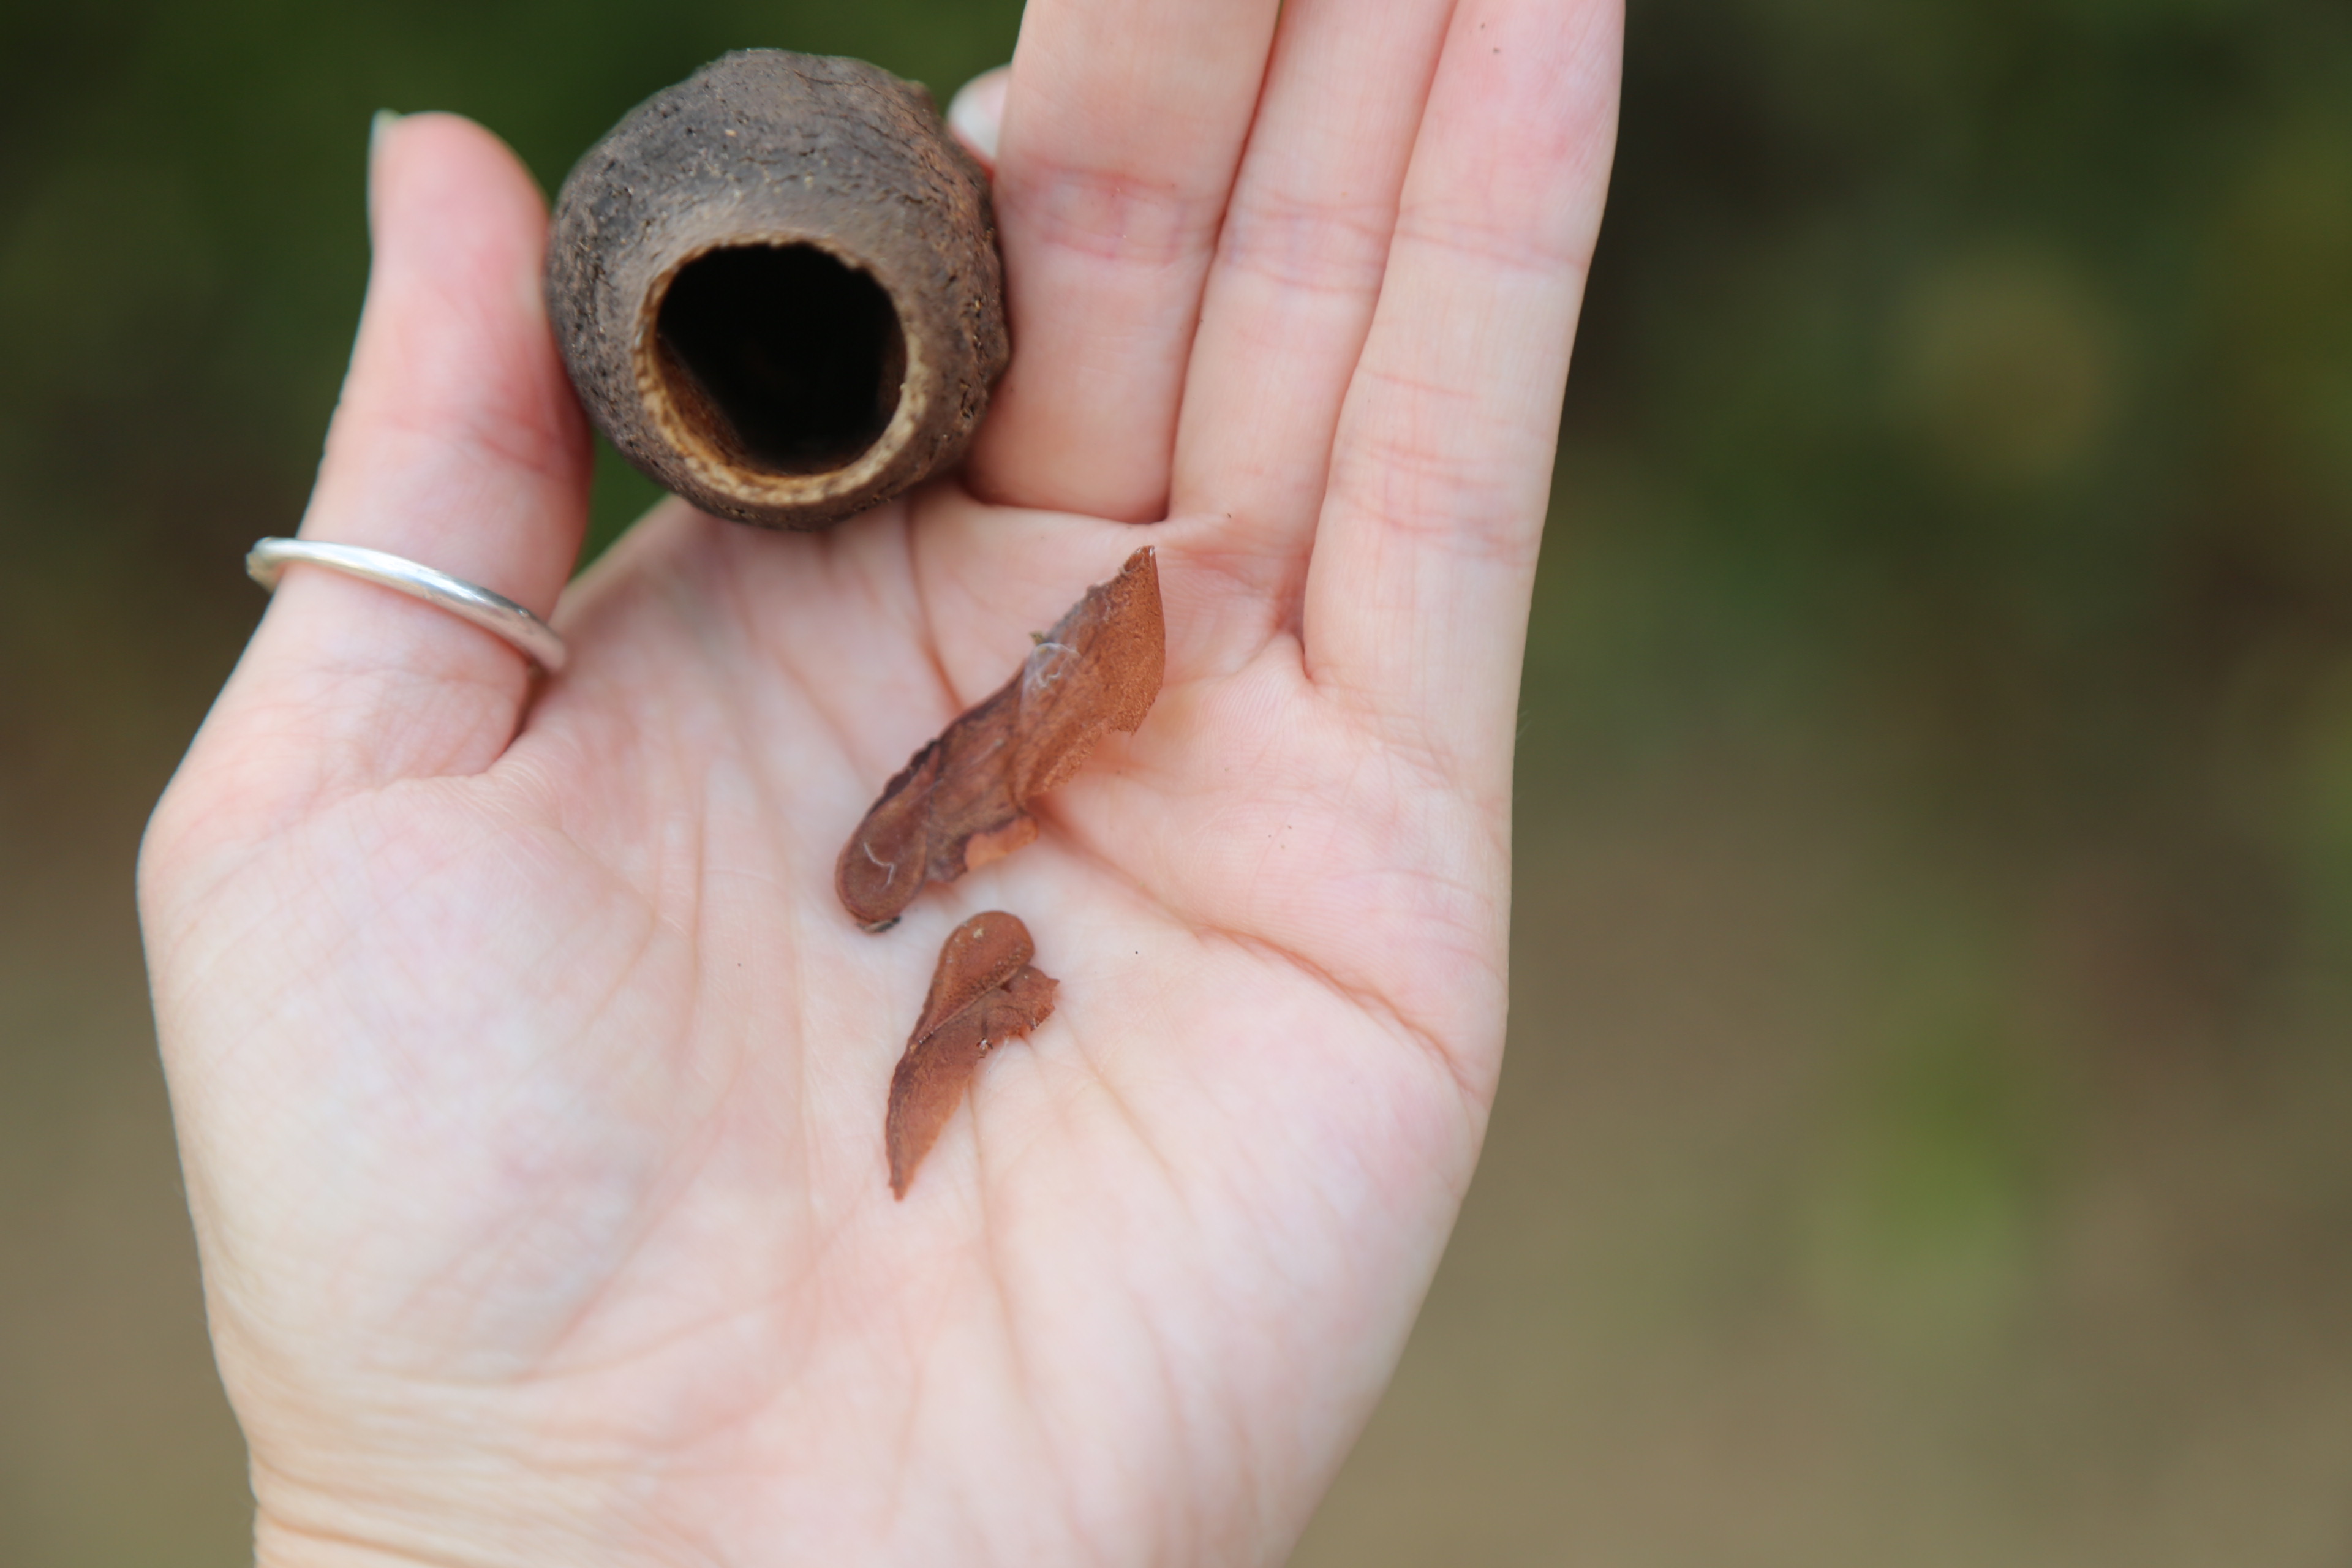
Exploring around Gamboa on trails and streets, I became fascinated with these flower-shaped seedpods. They appear as woody flowers, nearly blooming to release their inner fruit, and then expanding greater as they dry. This seedpod stalk was the first jungle object that I picked up as debris in the streets of Gamboa, and served as my first inspiration for a basic bio-hacking LED light project. What follows is a quick and easy tutorial for a basic natural object bio-augmentation project. This can serve as a simple lesson plan to explore bio-hacking to merge technology with natural objects and the directionality of LEDs.

Personal Process

Decorative Light: Personally, I explored various ways to rig this seedpod stalk as a full LED light that could decorate a space as a hanging decorative light. For this, I experimented with various conductive materials provided by Dinalab, including conductive thread and copper tape. I hoped to use a conductive wiring material that would either blend in to the seedpod stalk, or add aesthetic detail in the form of an attractive color or form. I did not settle on a favorite method for this full-stalk augmentation, and encourage others to pick up this process to explore different modes of creating a lamp with many seed pods!

Tactile Engagement: I also explored various interaction designs using LEDs to inspire tactile and up-close exploration of this seedpod I found to have such a fascinating shape and process of opening. In this exploration, I used LEDs activated by a DIY button where squeeze intensity and location determined which LED would light, and LED brightness. These LEDs and the tactile button control were meant to encourage a viewer to pick up the seedpod stalk, and explore both its structure and LED light augmentation as a way to encourage close observation of a natural structure.

Tactile exploration of bio-augmented LED seedpods, including fun Dinacon atmosphere of giggles and sharing work with an inspiring peer!

Project Tutorial: Quick educational lesson plan to explore bio-augmentation and LED basics!

Overview

In this quick tutorial, we explore a basic bio-augmentation project of adding an LED to a dried seedpod in order to make a quick and easy light. This project highlights the directionality of LEDs, and explores how technology and nature can merge to create new and innovative forms based on personal interest and exploration of natural objects.

Materials

  • Seedpod!
  • LED
  • 5V coin cell battery

Description

The miraculous element of this project is how perfectly the base of one of these fully opened seedpods fits a standard 5V coin cell battery. This served as inspiration for this project, and allows the little LED product to be a compact and pretty sturdy unit!

Basics of LEDs: LED stands for “light-emitting diode.” A diode is a semiconductor device which only conducts electricity in one direction. An LED is a particular type of diode that emits light when current passes through it, in the positive to negative direction. On a basic LED, you can tell which side is positive for wiring because the positive prong is longer.

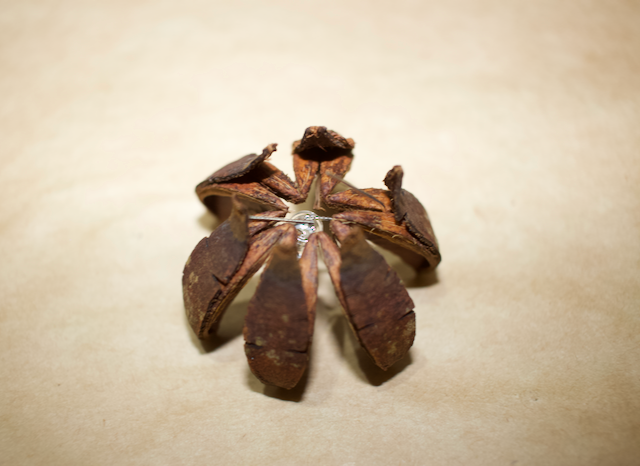
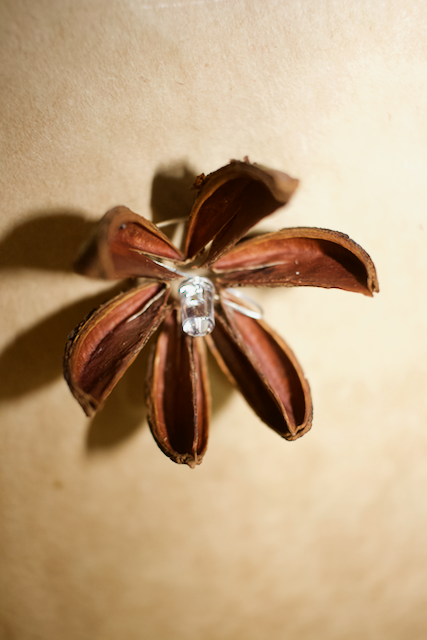
To fashion your own seedpod light, first note which side of your LED is positive (longer wire) and which side is negative (shorter wire). Then, extend the prongs of your LED horizontally, and carefully place your LED into the center of your seedpod. Position the LED prongs as close to the base of the pod as possible, and between “petals” of the pod. To secure your LED in your seedpod, carefully bend the prongs of your LED down with tension, which will secure your LED in your seed pod.

LED positioned in the middle of the seedpod, like the center of a flower. LED prongs are positioned through the gaps in the seedpod “petals,” and bent downward to secure the LED in the center of the pod.

From here, bend your LED prongs. Bend the negative prong to lay horizontally across the back of your pod, as close to the base as possible. Then, bend your positive prong above this, but leave slightly more space from the back of the seedpod. Make sure the positive and negative prongs are not touching, as this will short-circuit your LED.

Negative prong is bent level with the seedpod base, very close to the surface (left wire). Positive prong is bent slightly above the surface (right wire, above).

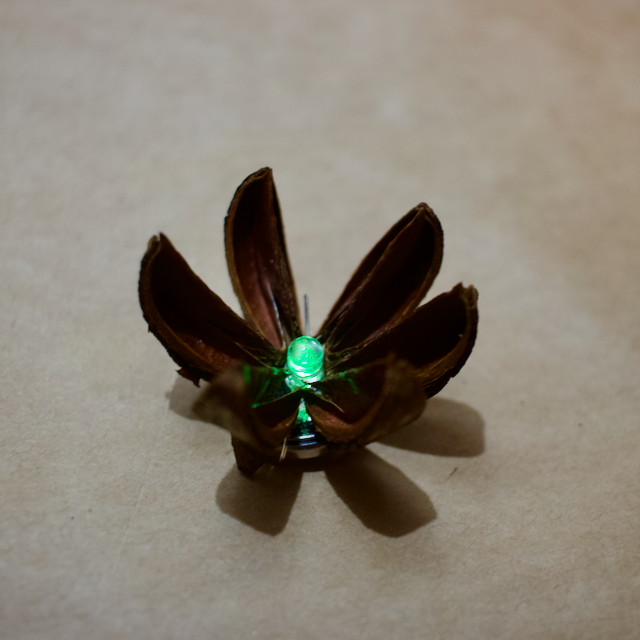
This little pocket between LED wires forms the fixture for your coin cell battery! Place your 5V coin cell battery face up (positive side up), and secure by clamping down the positive LED prong over the battery. Keep bending until the battery is snugly secured in the seedpod, and firmly contacting the negative LED prong.

Your LED should now be lit, leaving you with a completed little bio-augmented seedpod light! Make as many as you want, now that you know the basics of LED directionality and can experiment beyond with bio-augmentation.

Feedback

Feel free to reach out with any feedback or interest. Thanks!

The Future Within – Grace Grothaus

Grace Grothaus
THE FUTURE WITHIN: A digital seed archive and interactive sculpture series exploring
threatened plant biodiversity in the americas


“First and above all an explanation must do justice to the thing that is to be explained, must not devaluate it, interpret it away, belittle it, or garble it, in order to make it easier to understand. The question is not “At what view of the phenomenon must we arrive in order to explain it in accordance with one or another philosophy?” but precisely the reverse: “What philosophy is requisite if we are to live up to the subject, be on a level with it?” The question is not how the phenomenon must be turned, twisted, narrowed, crippled so as to be explicable, at all costs, upon principles that we have once and for all resolved not to go beyond. The question is: “To what point must we enlarge our thought so that it shall be in proportion to the phenomenon…” – Schelling


“The future is not in front of us, for it is here already in the shape of a germ (seed).” “What is not with us will not be, even in the future.” Čapek


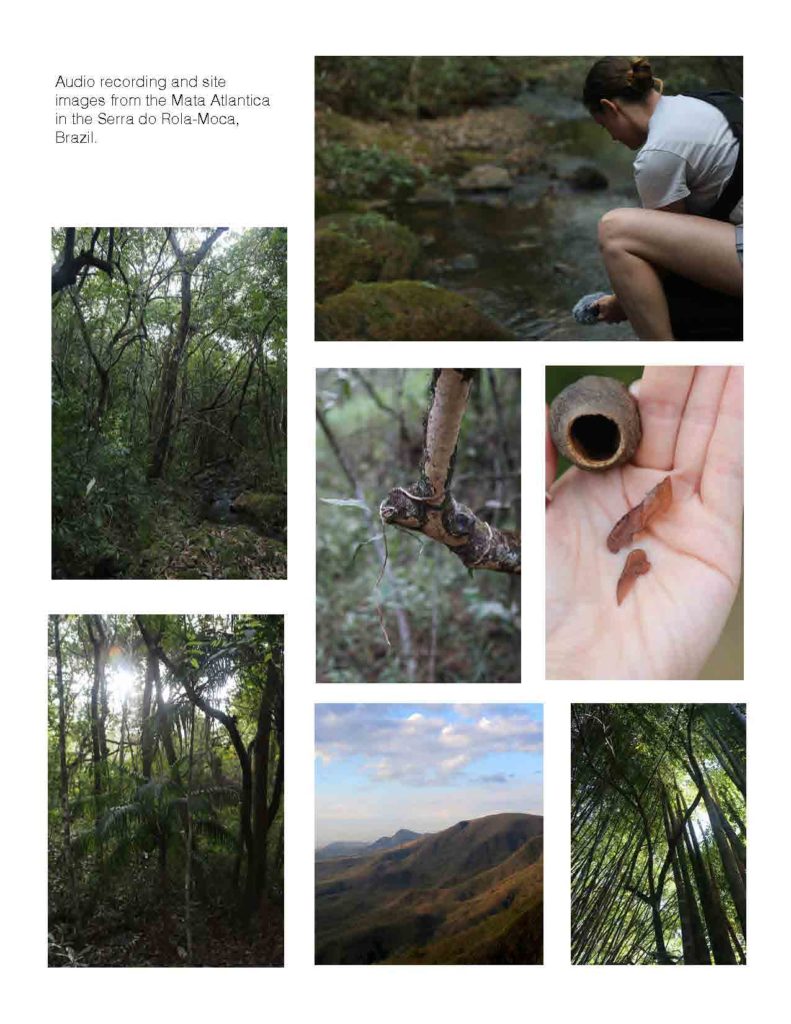
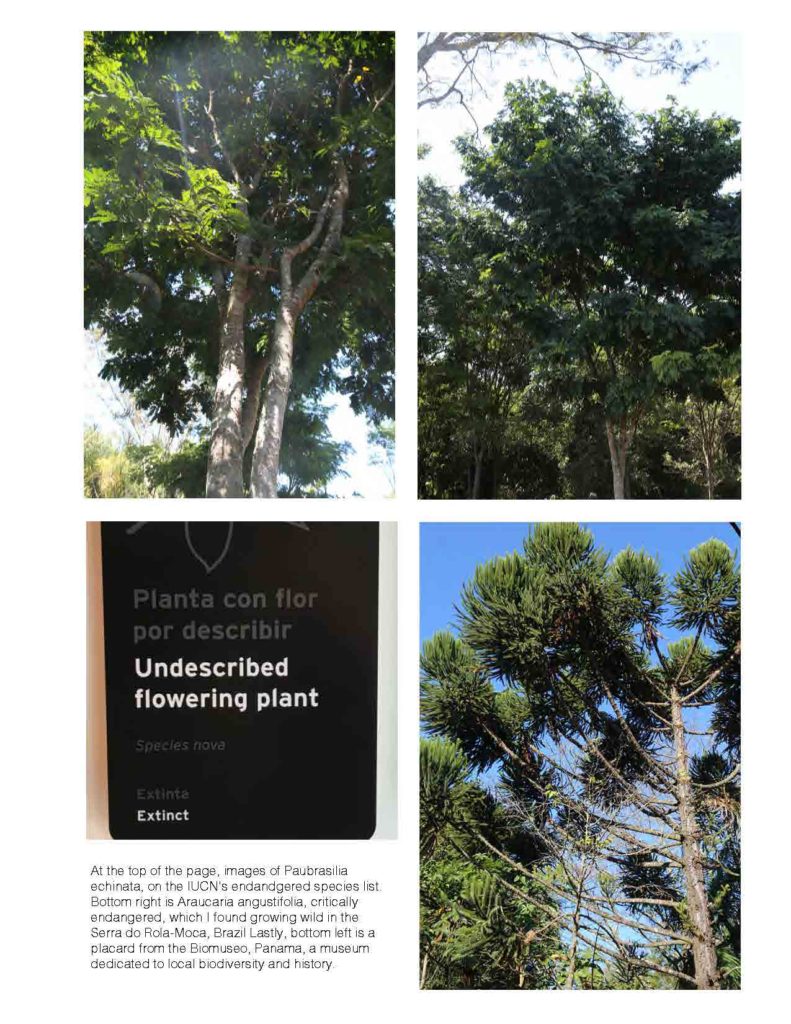
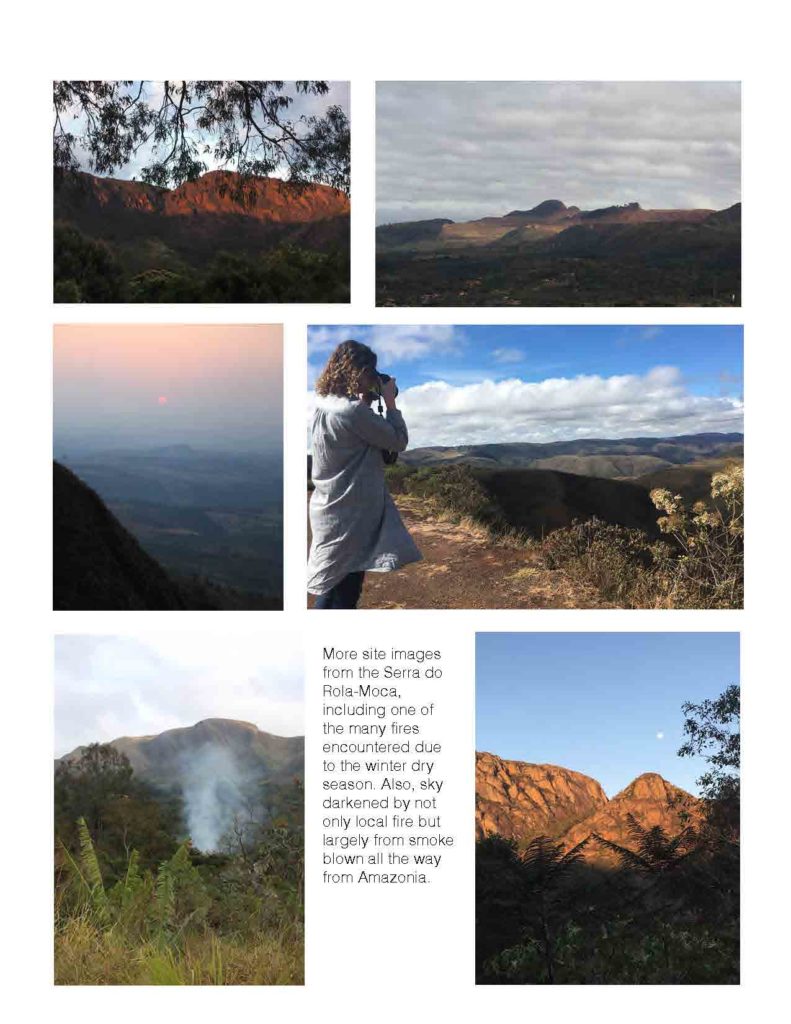
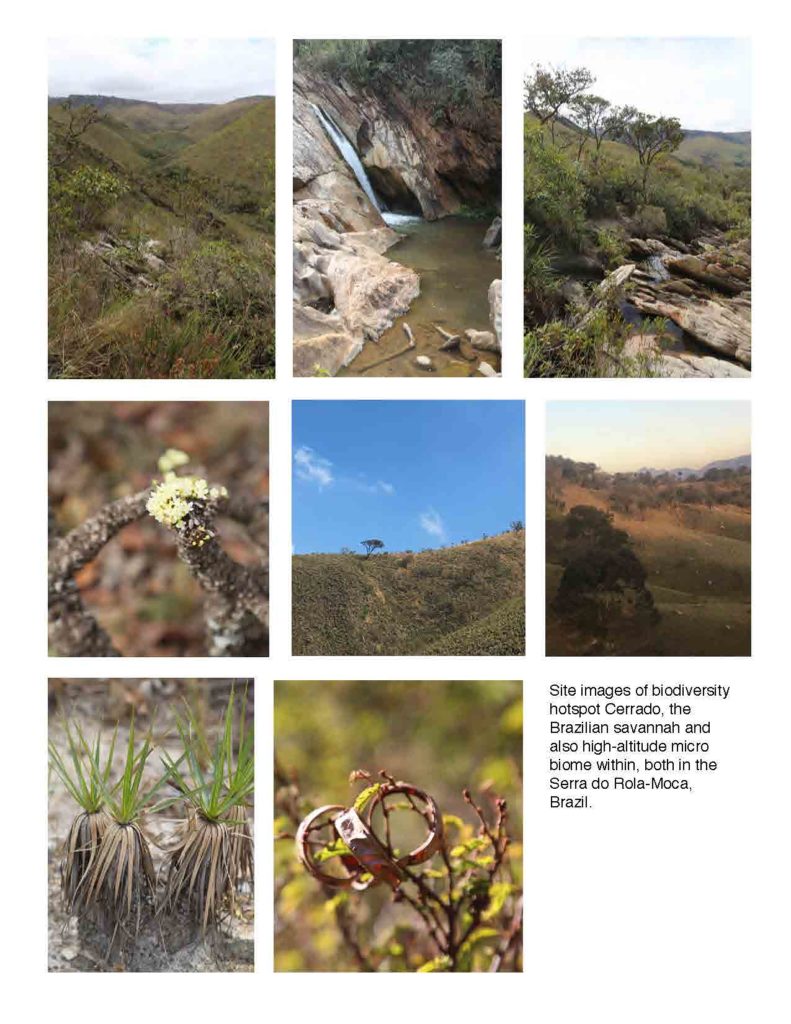
A result of cumulative anthropogenic activity, global mass extinction is currently in progress, a phenomenon which many refer to as the sixth extinction. I am attempting to grappling with this phenomenon as an artist and to live up to the enormity of the subject. In Schelling’s expostulation I begin to see the beginnings of a course of action. To enlarge my thought to be in proportion to the phenomenon, I must immerse myself in it, far beyond the four walls of my studio. In so doing I deepen my knowledge base and in turn the efficacy of my artistic practice upon return to studio. We see more clearly by recording what we see firsthand. With this understanding and via the support of the Digital Naturalism Conference, the Tinker Foundation, and the University of California San Diego, I conducted field research July-September 2019 in forests across the Americas: South, Central and North. Specifcally in the Panamanian canal zone tropical moist broadleaf forest (“rainforest”), Brazilian Cerrado, Mata Atlântica, and the North Atlantic forest of the Blue Ridge Parkway. Especially in Panama and in Brazil, these biodiversity hotspots are home to a great number of endemic species, some of which have not yet even been discovered. Especially in Brazil they are also threatened. According to UNESCO, the Cerrado, the second largest biome in South America, less than 30% of the natural vegetation remains and continues to shrink and the original Mata Atlântica has experienced 85% deforestation. These are places of irreplaceable biodiversity. For example the Cerrado is the most biodiverse savannah in the world. Yet devastating losses continue. It is highly probable that many endemic species have already faced extinction before being recognized by the scientific community and the broader world at large, and even more are at risk today.

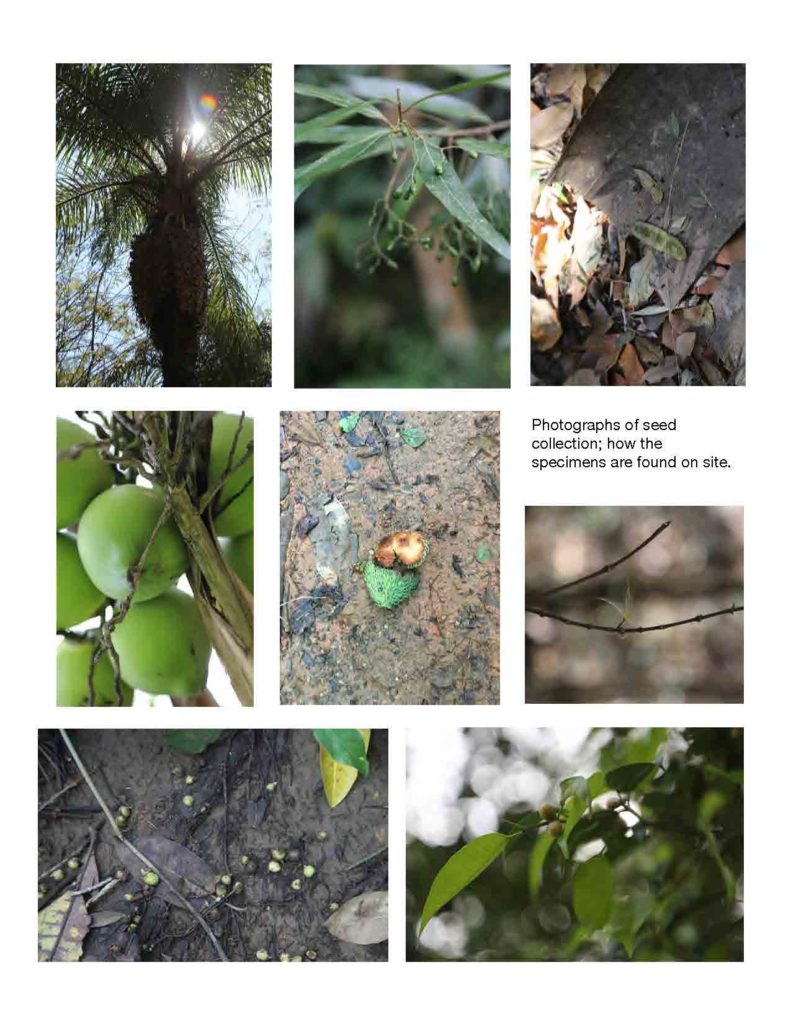
These past few months during my hikes in these forests and grassland, I sought out seeds, seedpods, and fruiting bodies of as many different plant species as possible and from them created 3D digital models. In this way I digitally collected 60 unique specimens in Panama during Dinacon, another 152 in South America, and 45 thus far from North America where I am working now. All together this represents 257 unique species. The digital models of them are comprised of a staggering 26,000+ images taken of the specimens during the photogrammetry process. In addition, I have nearly seven thousand photographs, video, and audio recordings, numerous field notes and
sketches. Via field guides and discussion with generous researchers at Inhotim Botanical Gardens, the Smithsonian Tropical Research Institute, and the University of California San Diego I have been identifying the species of my specimens and learning about them.

In particular, discussion with two of STRI’s post-doctoral research fellows about their
research into seed dormancy in tropical forests was eye-opening. Seeds in more temperate forests are known for their lengthy fertile dormancy and it is not unknown to find specimens to lie dormant but still viable for even tens of thousands of years, yet in tropical forests the duration is much shorter, ending after only a few years and stretching into a decade or two max, species and soil conditions dependent. Reasons are not wholly clear, yet in both locations the seeds are not impaired by the soil, rather they actually need the soil microbes for the possibility of germination. Like the wildfires of the Cerrado, tropical soil is able to abrade the seed surface enough for germination. Seeds possess a chalazal area or plug, a round location on the surface that must break away, in order for the plant embryo inside to emerge and grow. In discussion of mechanisms by which future climate change may affect the species they study, the researchers explained that it is not only microbial/soil abrasion in the tropics that are sufficient to break physical dormancy in seeds, but also fluctuations in
the soil temperature. Surface soil temperature is dependent on ambient air temperature and so in a much warmer future, the viability window of opportunity for these seeds may well shorten. This is but one of the numerous concrete mechanisms by which species in this biome face future loss and potential extinction, and one I was previously wholly unaware of.

It can be cognitively difficult to focus on the slow growing and near silent plants around us. We have a tendency to look at plants as part of another and separate “natural world,” perhaps even a backdrop upon which we and other animals live out our lives, but this mindset is a fallacy. Plants are the keystone upon which all mammals rely.
The pace of plant growth is so slow compared to human movement, it lends toward the human impression of the plant world as constant, reliable backdrop, yet everything is growing constantly and all that I observed was constantly in flux. I’m grateful for the extended time dedicated to careful observation this field research provided, and reminded of Heraclitus’s truism that you can only step into the same river
once. In the same way that it is difficult to focus attention for the length of time requisite to really witness a plant grow, climate crisis is similarly difficult to observe, and yet with both the cumulative changes are unmistakable.

The photogrammetry process enables me to digitally collect only and leave no trace behind me – the real specimens in their home environments where they belong. I am developing a growing digital record, but just a tiny fraction of the species diversity that was all around me. Many more species were not in seed during the time of my visit and many more eluded my discovery, having already dispersed to the wind, soil, or animal digestion. The seed specimens I did collect vary greatly in size from a paper thin ~1/64 of an inch thick to 18 3/8 inch long. I was thorough in my collection but still others were too small, lacking any dimension of length and therefore impossible to capture using the set-up available to me. Perhaps farther in the future with other support I’ll be able to model via micro MRI imaging. In the near term I am now in the process of turning these digital models into sculptures. printing them into physical objects and embedding my motion-sensitive electronics inside that will enable the finished sculptures to murmur sounds into our ears. If a seashell held to the ear presents to our imagination sounds of the ocean though in fact amplifying the rush of our own blood circulating, then perhaps these seed sculpture sound compositions, composed from field recordings and whispered text, will amplify our hopes and fears about our planetary future to a level that we cannot ignore.

Tadpole Soundscapes of Gamboa

By Lee Wilkins and Samantha Wong

Tadpole Soundscapes of Gamboa is a generative soundscape made in collaboration with wildlife of Gamboa. The audio is generated via Processing through a live webcam feed of tadpoles. Recordings are compiled from various artists to create a unique soundscape based on the movement and patterns of the observed tadpoles.  As the tadpoles move and evolve, so does the soundscape.

Recordings featured by: Peter Marting, Michael Ang, Lee Wilkins.

ATTAFit – Workout Like a Leafcutter Ant

Ann Gerondelis, Drexel University
Raja Schaar, Drexel University

Project created for the Digital Naturalism Conference, 2019 Gamboa, Panama

Walking around Gamboa it’s hard not to be mesmerized by the superhighways of ants recognizable by large distinct paths of wobbly leaves.

Our team dove into observational research, expert knowledge, internet findings, and one amazing book found at the field research station to find out more about these mesmerizing creatures.

Getting swole like an ant?

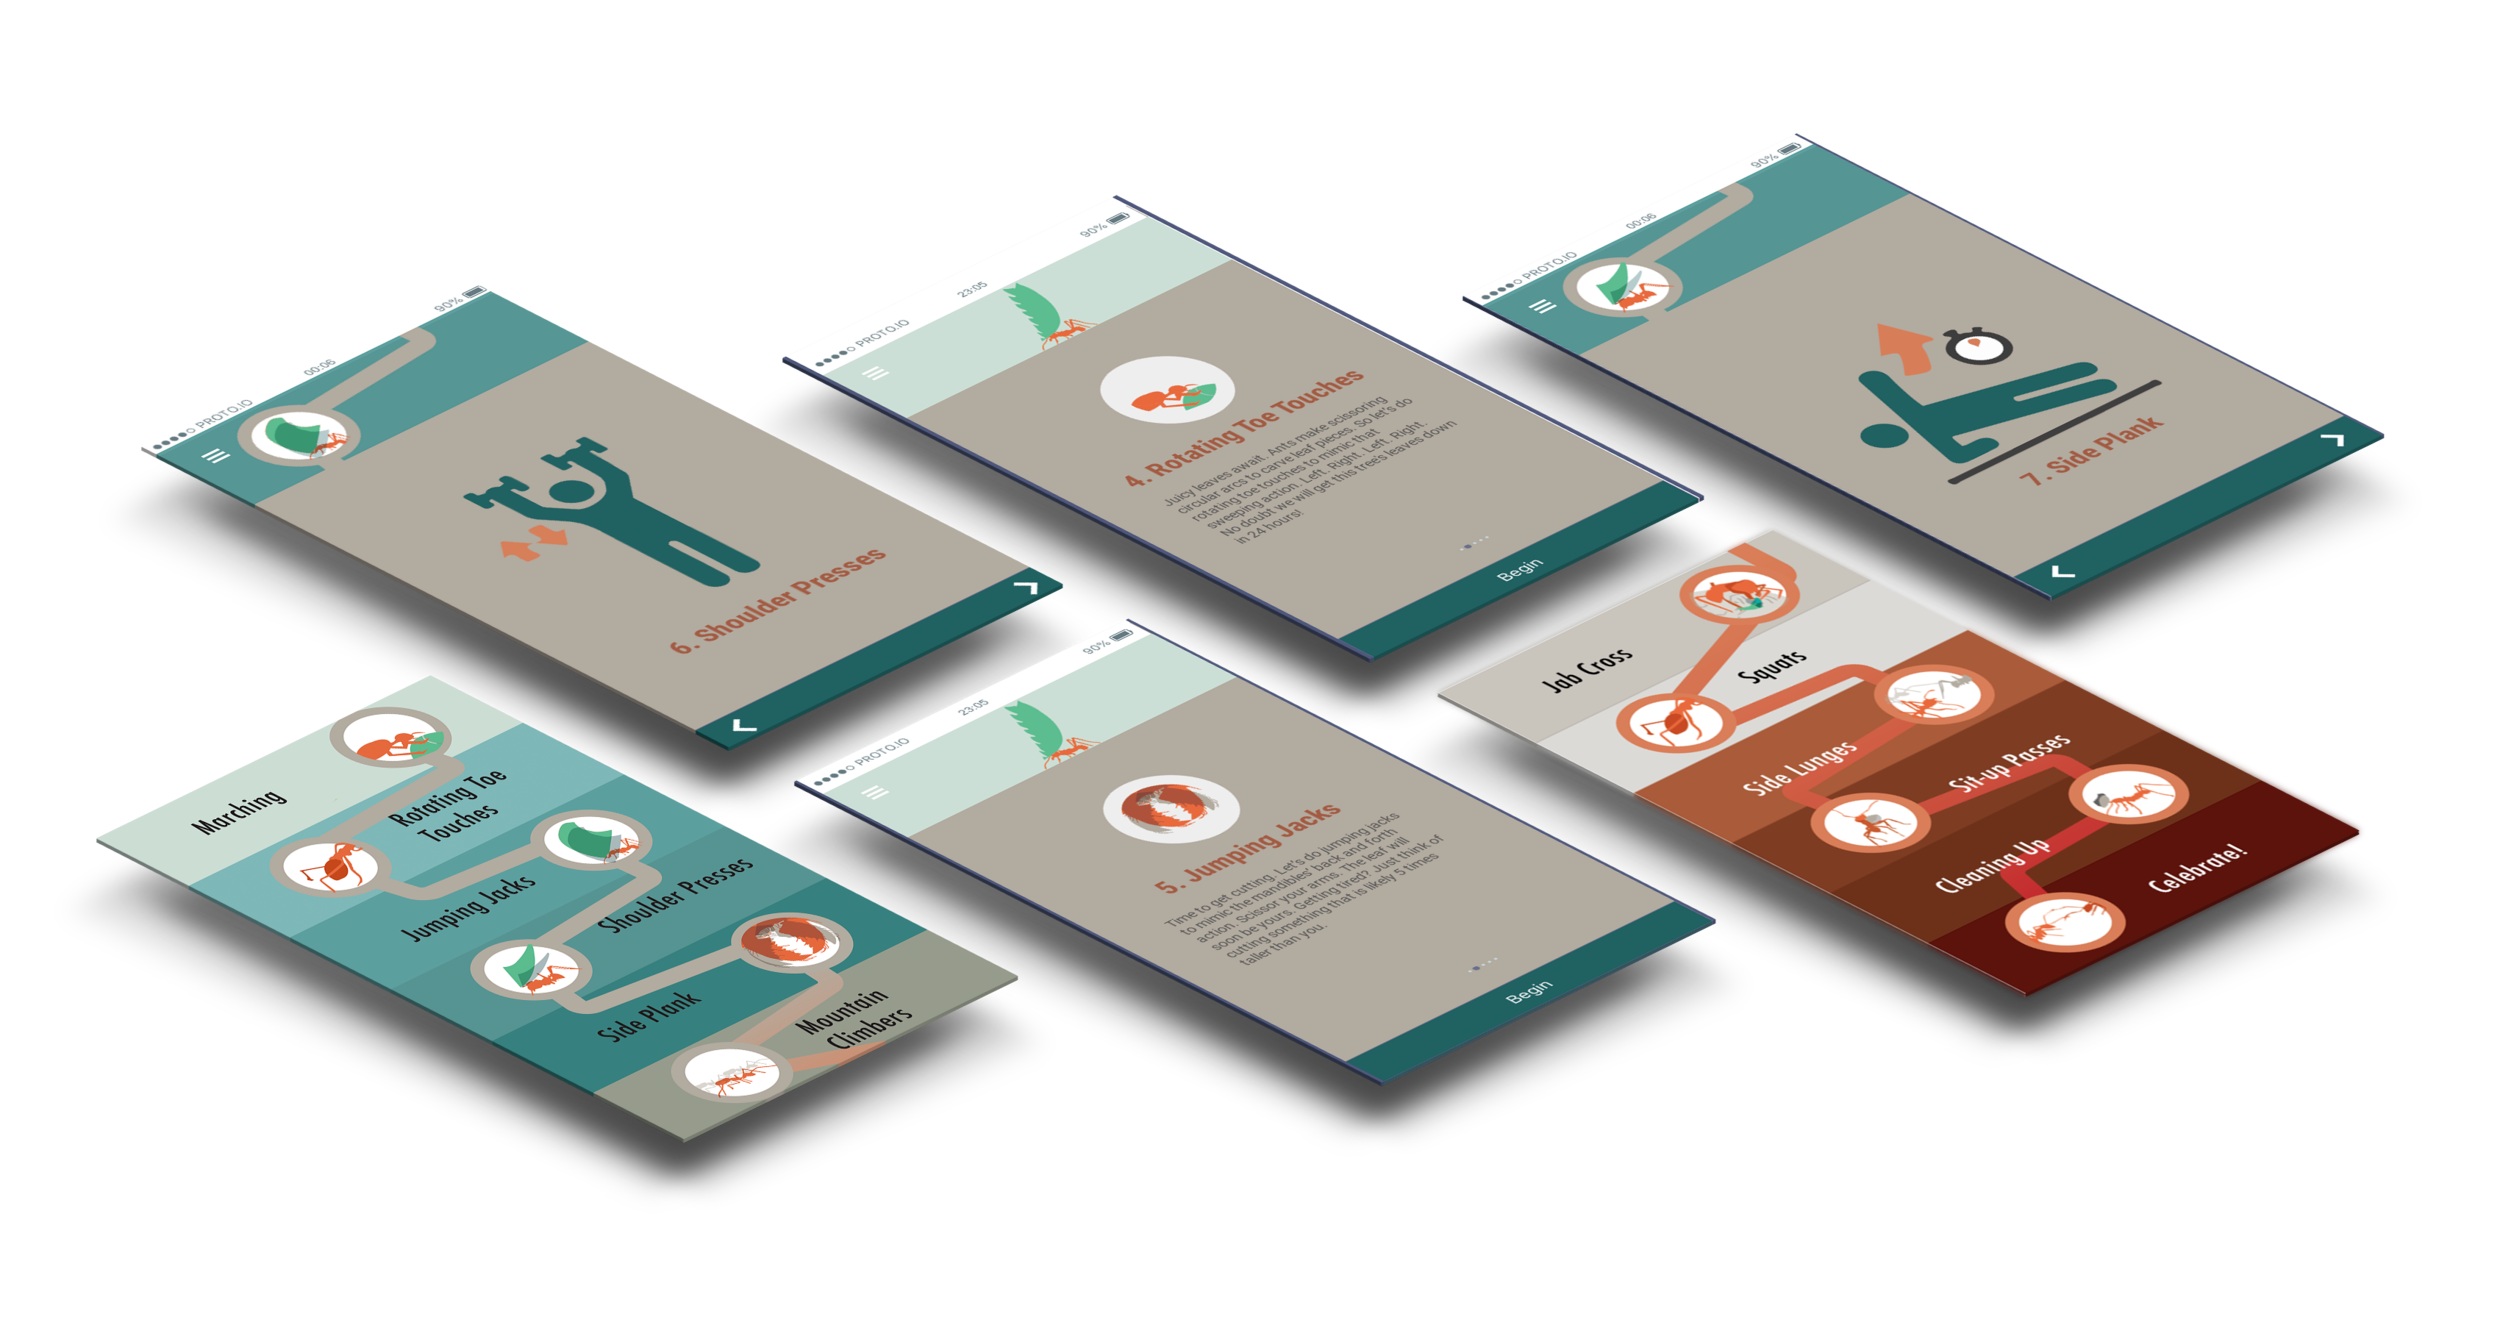
A fitness app for digital naturalists and folks who think Leaf Cutter Ants are superfit superorganisms.

This short workout invites you to be the ant, strengthen your body, and learn about ants’ intimate relationship with mother earth.

Process

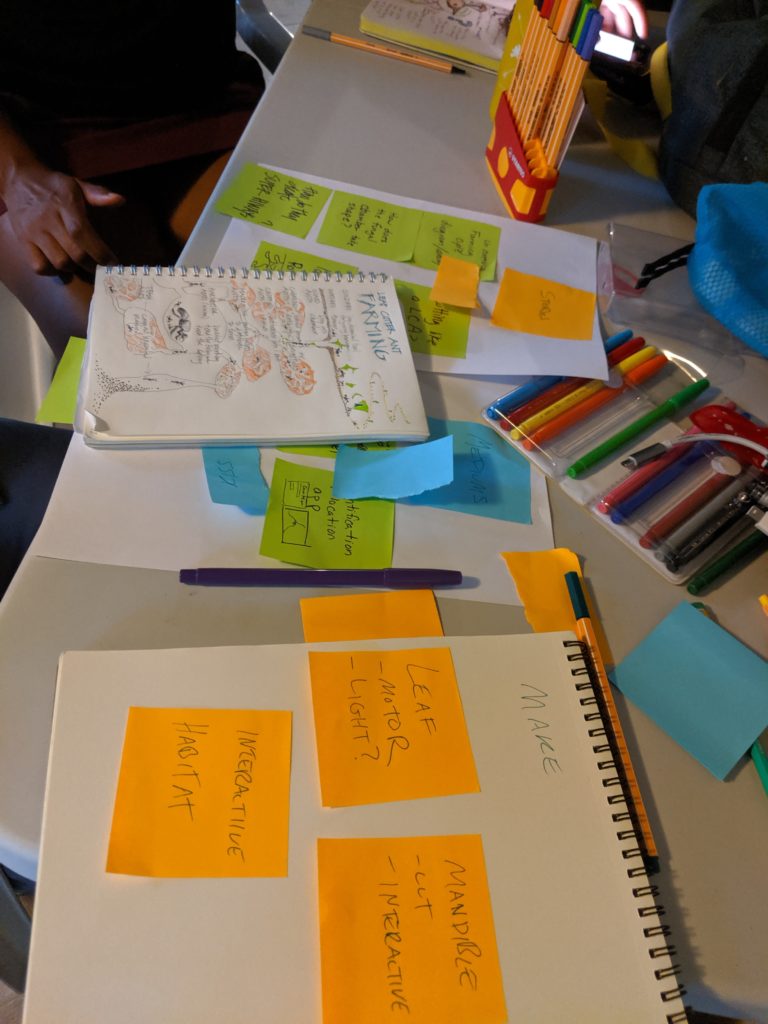
Over a four-day period, we designed, tested, and prototyped our app with fellow conference attendees (surrounded by the rainforest no less). The content was key in delivering an experience that mimics the fascinating farming of fungus and other leafcutter ant behaviors.

Prototype

We hope this gives you a glimpse into the above and below the ground world of the leafcutter ant.

Thanks to all the Dinacon attendees, Henrietta Mango the sloth, and Smithsonian scientists who inspired us during our time at Gamboa!

Andrew Coates

Andrew Coates is a specialist in Tropical architecture that is sustainable (Cresolus.com). Gamboa is home, office and inspiration since 2002. Cresolus moved to Panama from East Africa.
Andrew, his wife Beth and their team work around the tropical world creating infrastructure and buildings that function well in hot humid climates.
Cresolus’ main focus is on National Parks facilities and systems. Other projects range from low income housing, schools, all the way through to very high end eco resorts.
We have completed projects across Central America and Africa. Currently working in Panama, Belize and Gabon.
Andrew is passionate about creating buildings that keep the occupants comfortable even on the hottest, steamiest day during a power cut.
He also loves camouflage, and helped design the one in the photo for the Gabonese National Park rangers’ uniform.
In 2015 Andrew and Beth founded The Gamboa Discovery School (www.gamboaschool.org) for ages 4-10. Which takes advantage of the natural and scientific assets of Gamboa.

The Sustainable Zine

The Sustainable Zine featuring the DinaCon logo lasercut by Andy Quitmeyer

Zines have been around for a longtime with the goal being to make something cheap and easy to reproduce. This means there’s a big reliance on printer paper and classic photocopier inks. Though this can make production easy it also means that it’s not the most environmentally friendly situation. Bleached printer paper takes a long time to break down, inks and toners are can be fairly toxic and create environmental issues.

Sid Drmay cutting down banana tree bark to one inch pieces for boiling

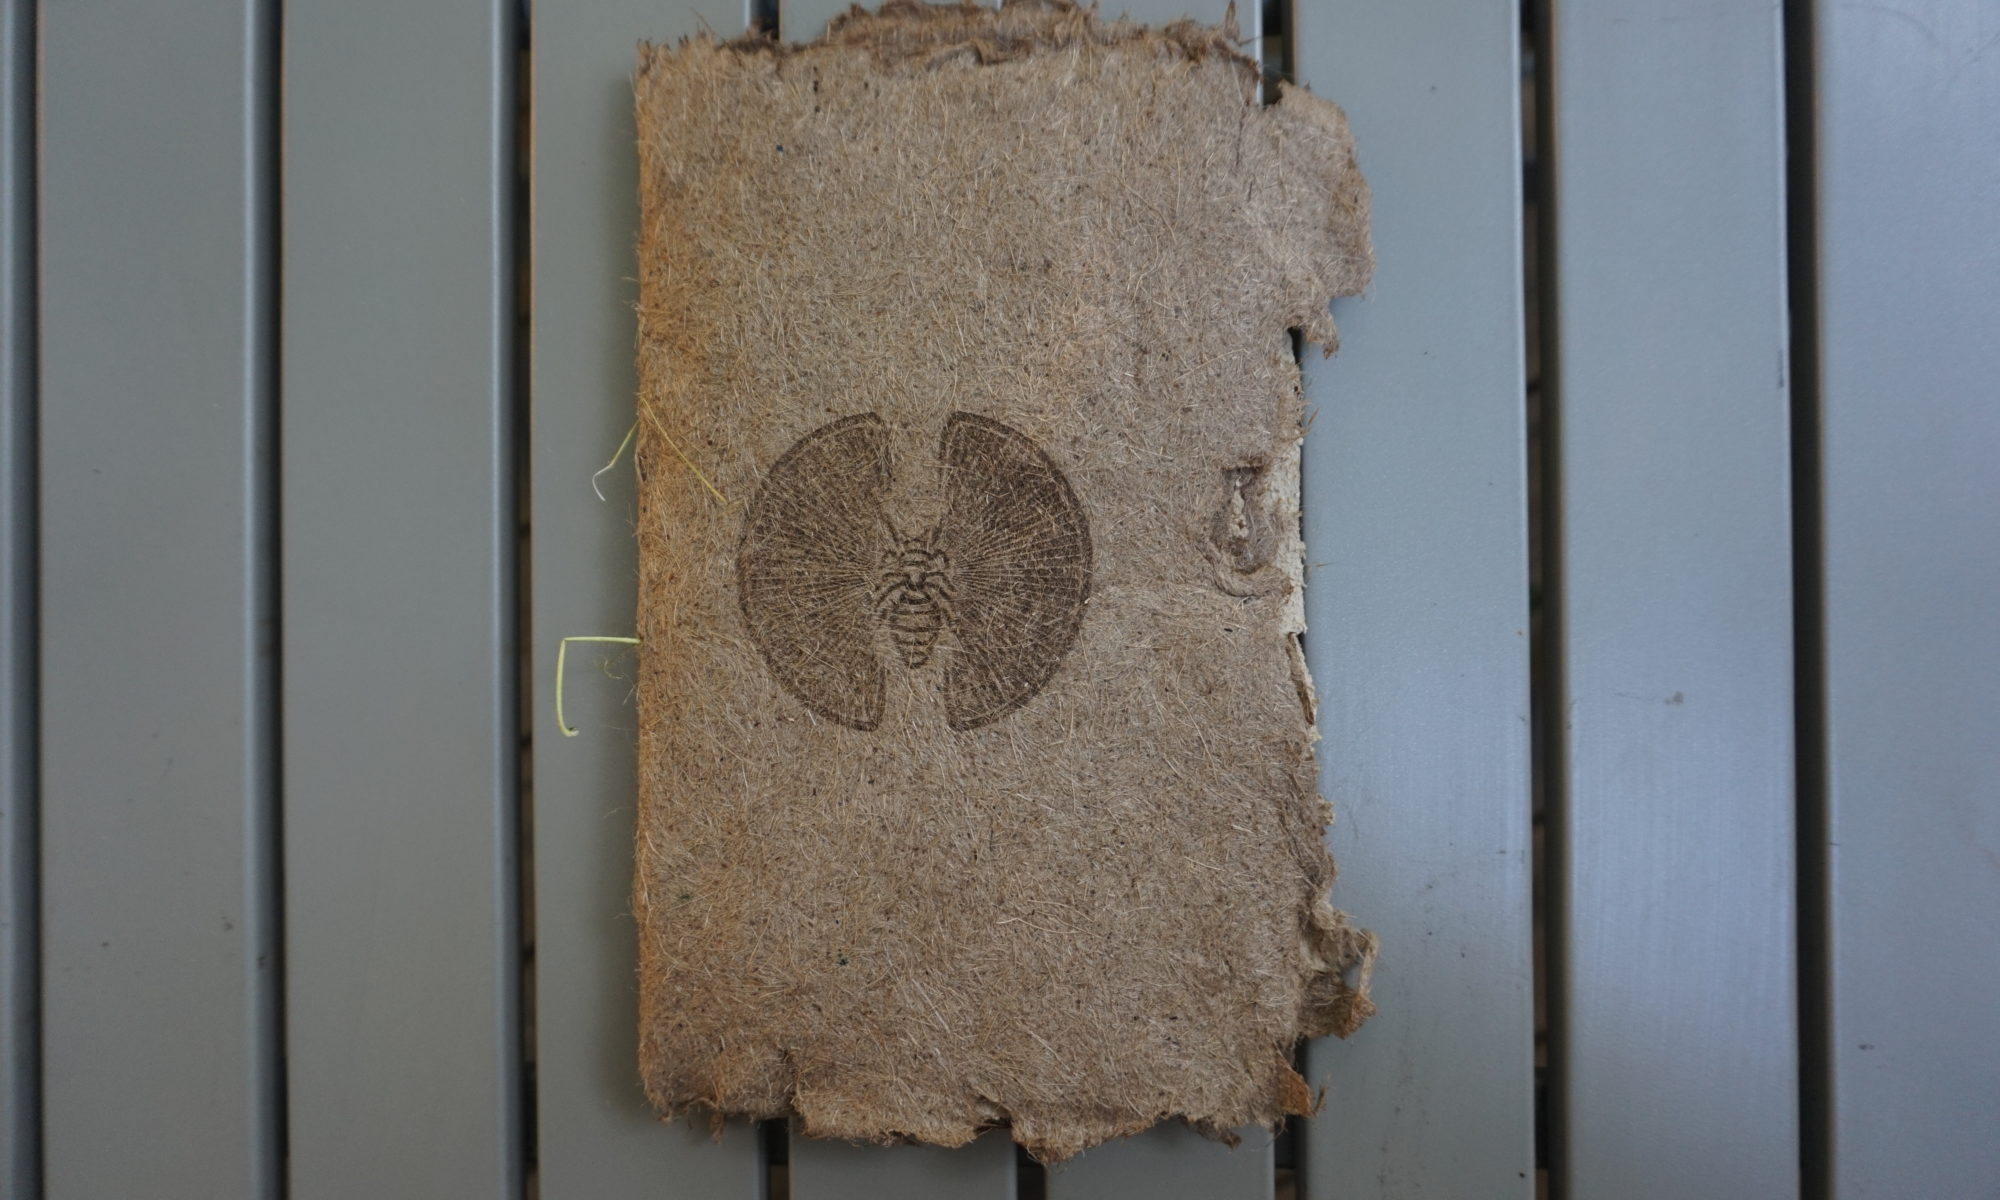
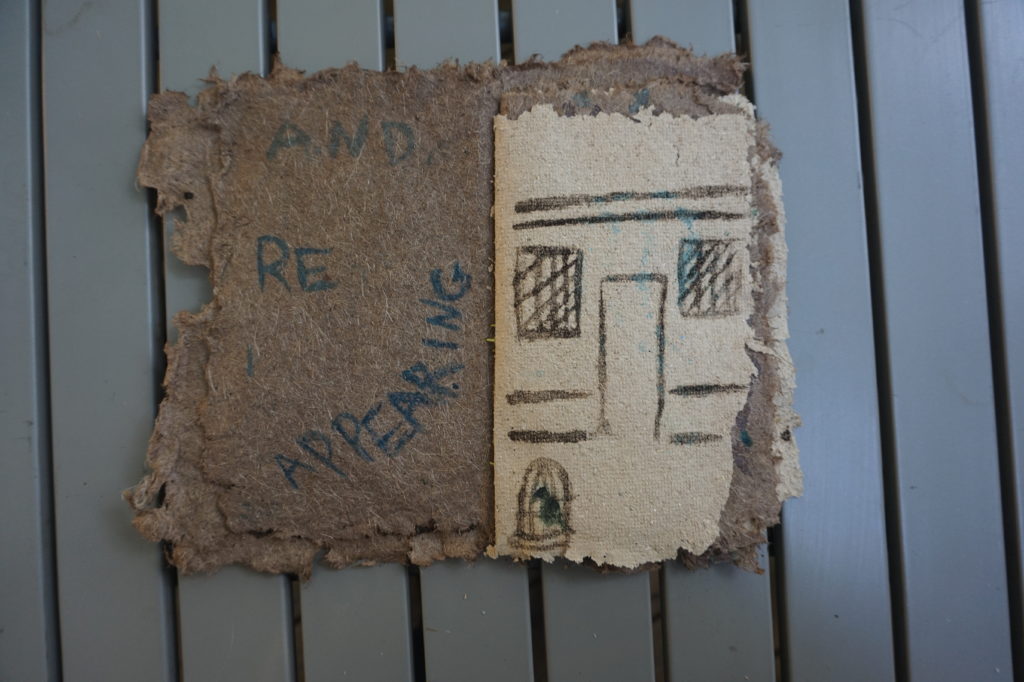
During DinaCon my goal was create a fully sustainable zine. My concept of sustainability was making something that would have little environmental impact and have the ability to break down easily as time goes by. This meant that I committed to foraging for materials to make paper, inks and binding for a zine.

The paper mould made with guidance from Rob Faludi

Here’s a breakdown the components and the processes involved with each part:

Mould – I made my paper mould on-site using scrap wood provided by Andrew Coates’ building team and screen that was DinaLab. This took two days.

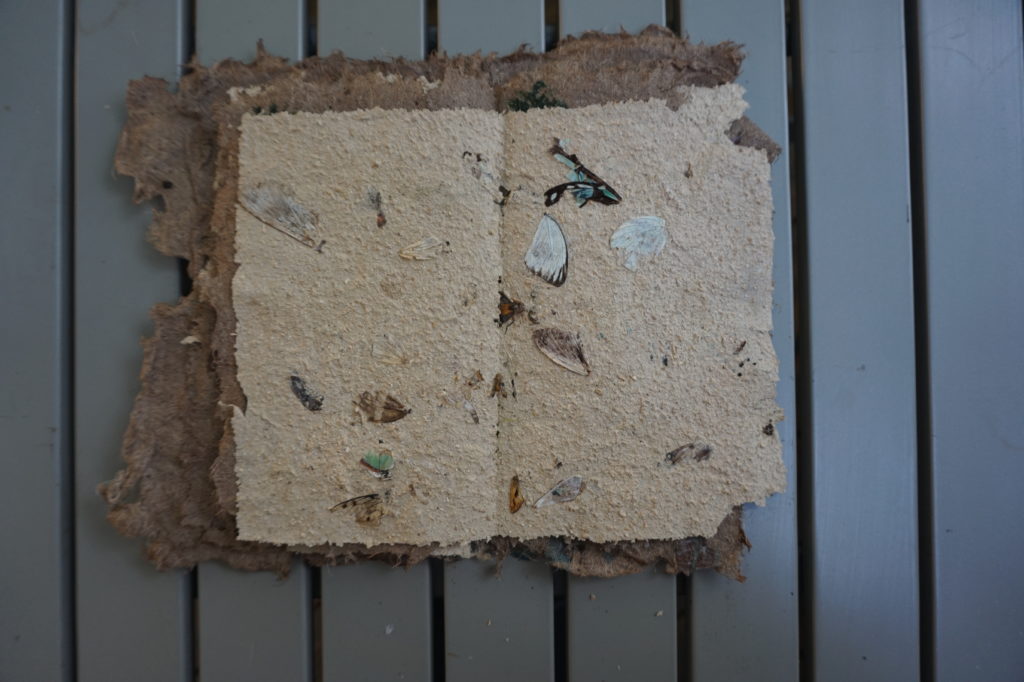
Brown Paper – Foraged banana tree bark, boiled for two hours and then blended to get pulpy. This was then put in a large plastic packing container with a 2:1 water to pulp ratio called a slurry. It took about 4 days of pulling and drying to make 12 sheets of paper.

White Paper – Foraged turkey tail mushrooms from a local trail thanks to Blackii’s suggestion, blended with water to get pulpy. This was then put in the large plastic container with the 2:1 water to pulp ratio slurry. It took 5 days of pulling and drying with a dehumidifier’s help due to the natural moistness of mushrooms to get 7 sheets of paper.

Black Ink – Foraged charcoal from a small fire, ground down and mixed with gum arabic to thicken. Gum arabic was the one item I brought with me from home, I wasn’t sure how much access I would have to a similar product. This took about 15 minutes

Blue/Green Ink – Algae pigment provided by the wonderful Elliot mixed with water/agar agar and gum arabic to try different textures and thicknesses. Each ink option took a few minutes to mix.

Brown Ink – This was made by boiling down rumbutan skins for one hour to get a gorgeous deep red burgundy and then mixing it with agar agar. This took one hour and 10 minutes to make.

Clear Ink – Mix of honey and coffee which made a transparent reflective ink which took the same amount of time as making a pot of coffee.

Wing Page – All the wings on the centrefold pages were foraged from different dead insects other dinasaurs used for their own experiments and projects. Once they were no longer being used I removed the wings and put them in the slurry and pulled the sheet with the wings embedded.

Bindings – The bindings are foraged vines from a plant in the backyard of DinaLab that I sewed through the pages for an easy bind. This took about ten minutes.

Sid Drmay and their handmade mould with a freshly pulled sheet of banana tree bark paper

The final zine was quite successful. It will be left to slowly degraded on its own to see how well the handmade zine lasts and breaks down. The content is entirely inspired by DinaCon, it’s attendees, the connections I made, experiences I had and has become a love letter to my time in Gamboa this summer. A special thank you to Andy Quitmeyer, Rob Faludi, Blackii Migliozzi, Elliot Roth, Ramy Kim, Ananda Gabo, Joetta Gobell, Lee Wilkins, Ashlin Aronin, Amanda Savage, Stephanie Rothenberg, Seamus Kildall, Andrew Coates and every other dinasaur that I had the absolute pleasure of sharing space with for all the inspiration and help.

Crepuscle, by Ashlin Aronin

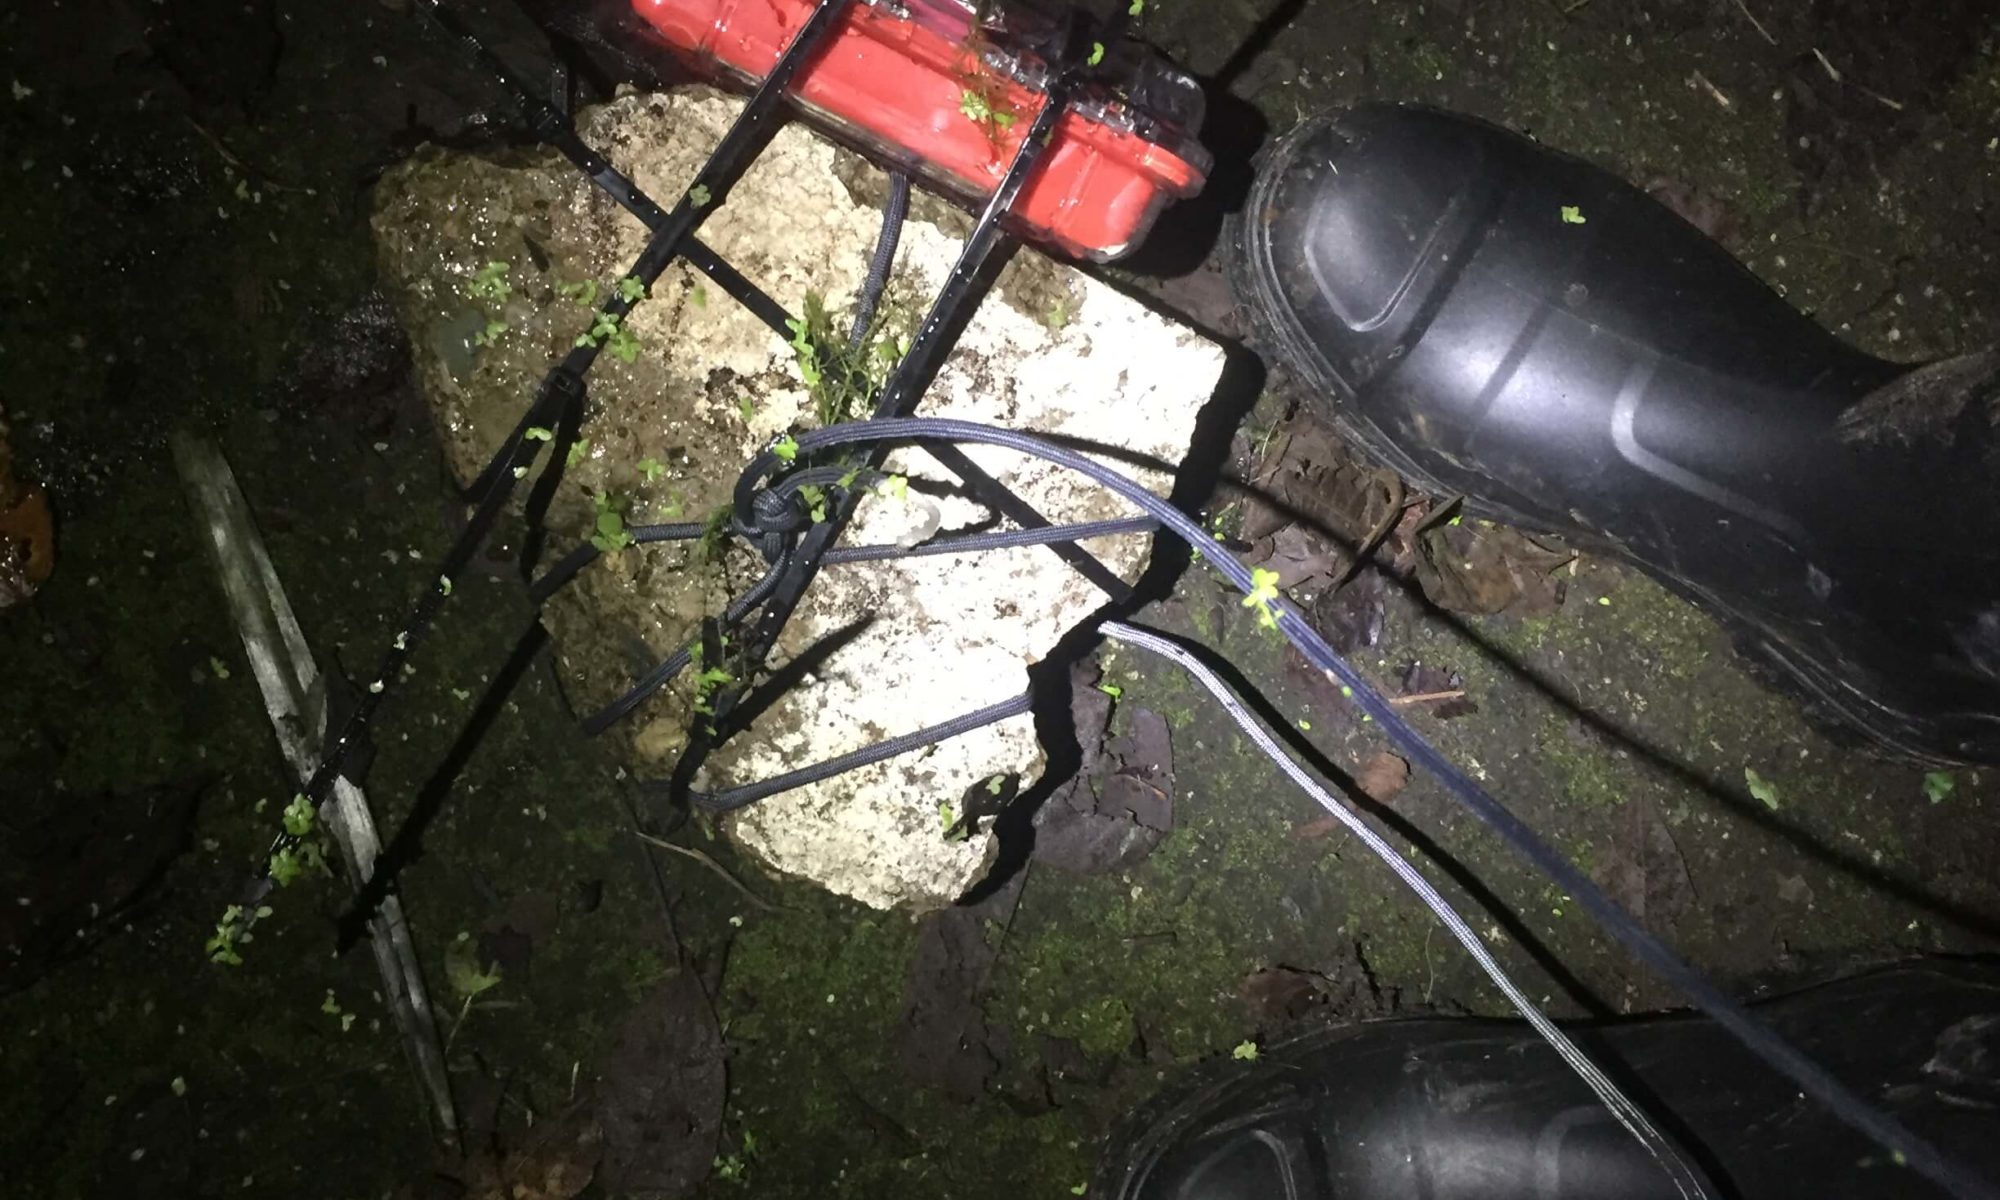
galoshes with crepuscle camera at night

Night falls in Gamboa, Panama — site of the 2019 Digital Naturalism Conference. The Tungara frogs come to life, filling the air with their uncanny mating calls resonating from murky ponds and puddles. As day breaks, they retreat. I created a submersible infrared timelapse camera to capture the experience of dawn from beneath the surface of a muddy puddle, the end of a long night of singing and mating.

Here are a few of the locations where the camera was deployed overnight:

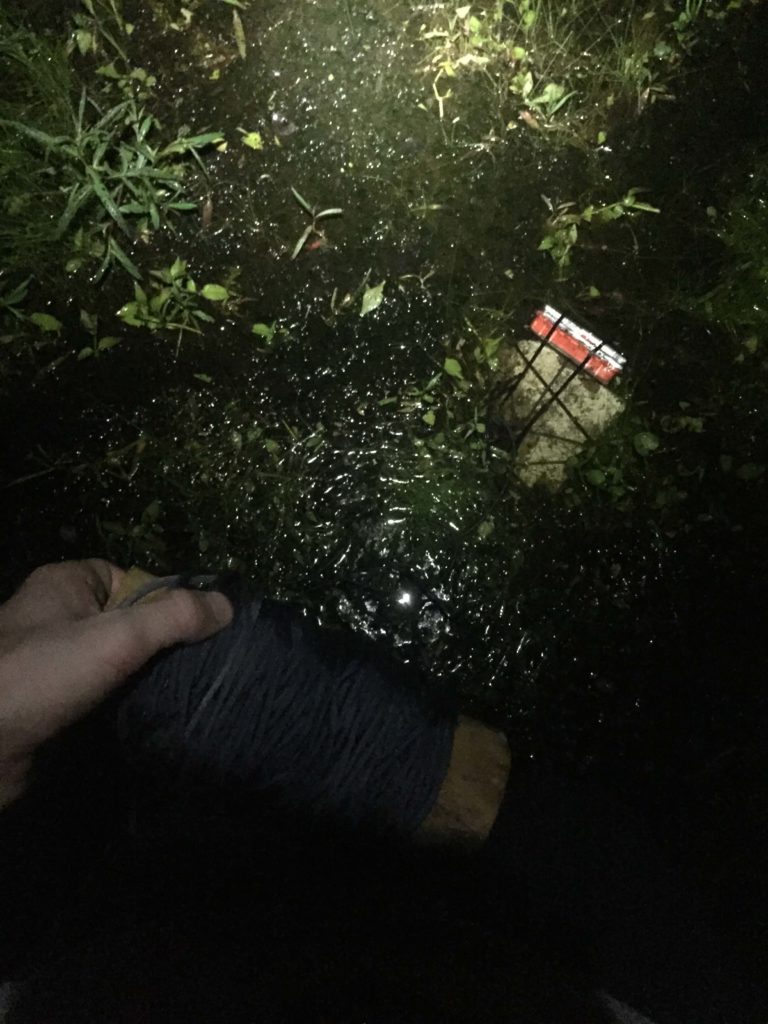
spooling camera cord into frog pond
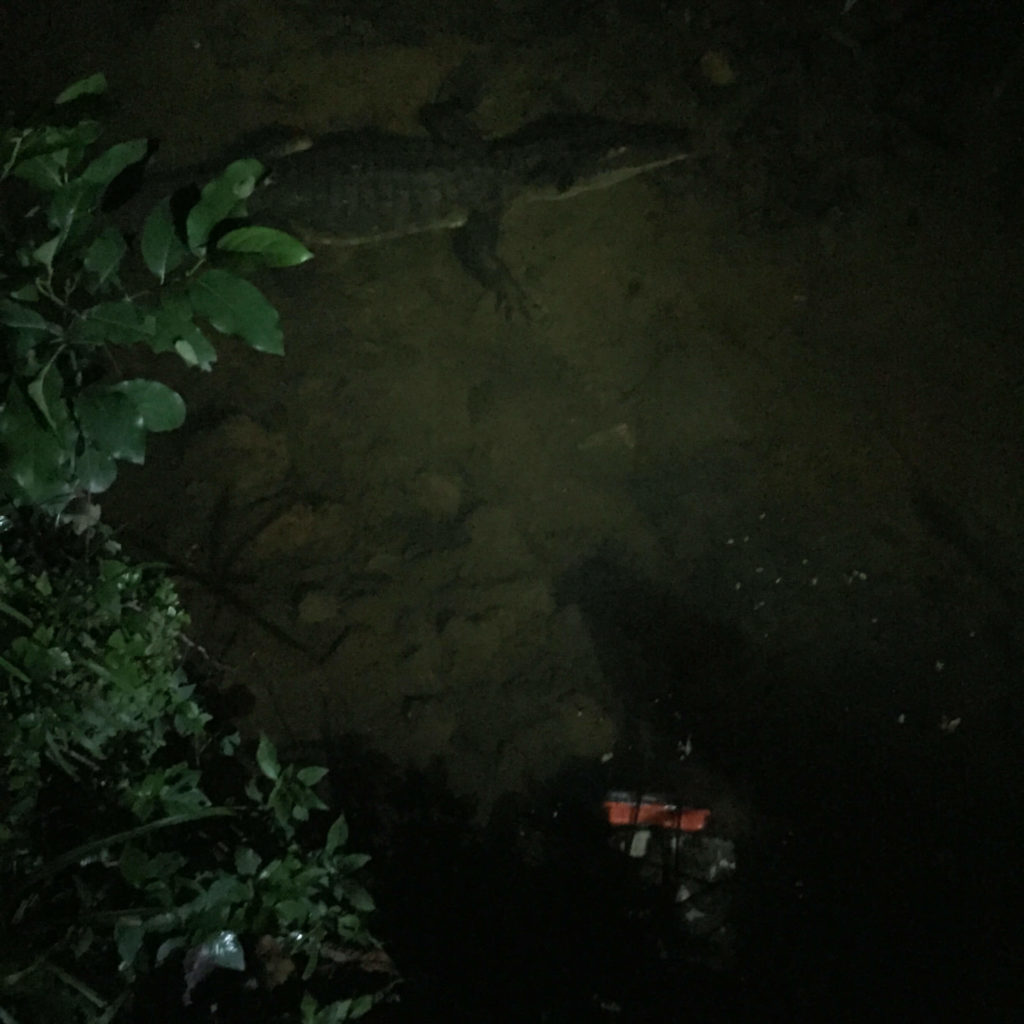
camera rig near a caiman
camera in frog puddle at night
crepuscle rig
crepuscle 3d scan

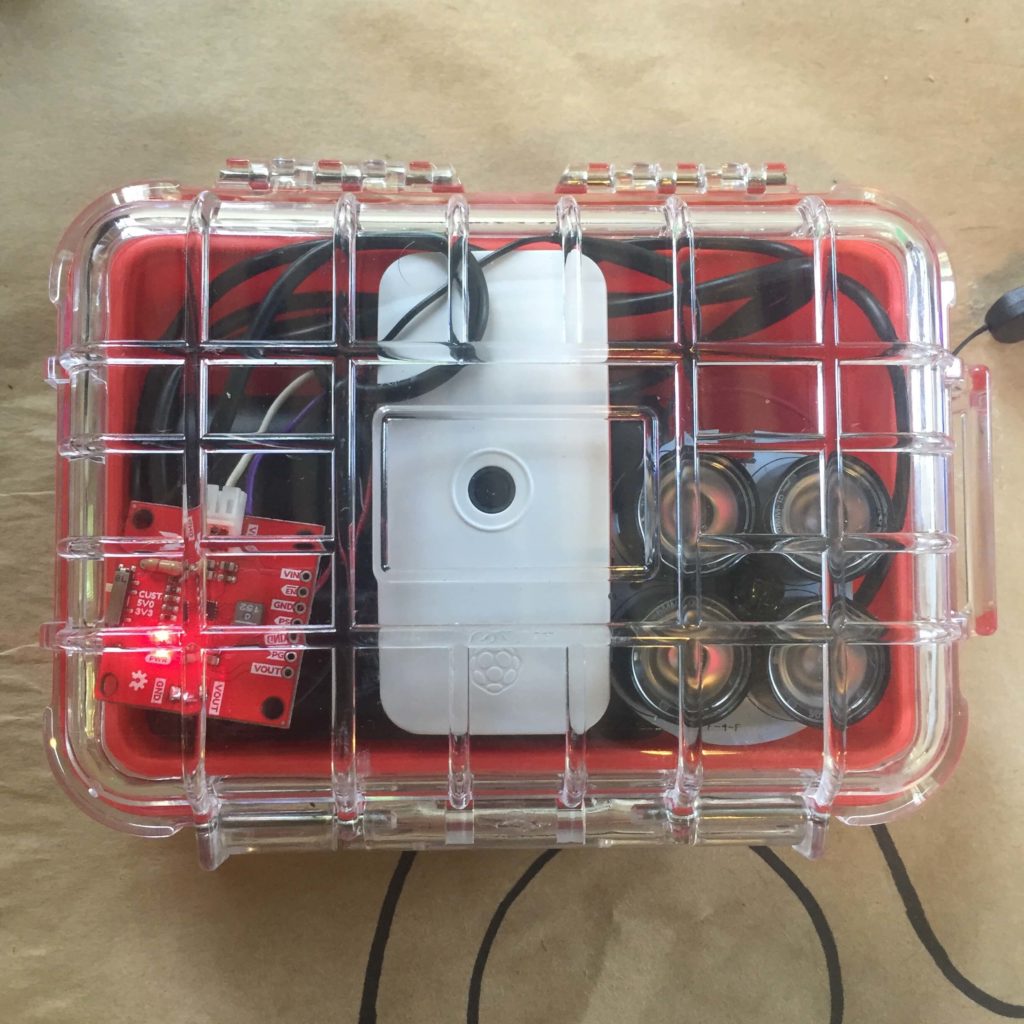
This is the device I ultimately produced (photo left, 3D scan right by Grace Grothaus). The transparent plastic on the box confused the scanner, but I find the aesthetic fitting, as if the capsule were rescued from the bottom of the ocean after years of decay.

I arrived at Dinacon with a loose idea of what I would need to make this project happen and what the results would look like. I brought an infrared camera, a Raspberry Pi, a waterproof case and 100 feet of paracord.

I took an iterative approach, repeatedly testing versions of the prototype. The first thing I realized was that for an infrared camera to work properly in low-light environments, it needs an infrared light source. I tried using one, then three small infrared LEDs in series, powered by the Raspberry Pi. It quickly became clear that this was not enough light to penetrate the murky underwater depths.

The next step was to take apart a heavy-duty infrared floodlight used by local bat researchers for nocturnal imaging. I extracted the circuit board and LEDs from the internals of this light, disabled the ambient light sensor and rewired the power supply to run off the Pi power supply using a SparkFun Buck Boost.

deconstructed infrared light

With this arrangement, I would experience seemingly random issues where the Pi would stop taking images and lose network connectivity once running on battery power out in the field. After some investigation and discussion with other knowledgeable folks, I measured the current drawn by the infrared light and determined it was drawing 1.8 amps. The battery pack I was using to power the Pi provides around 2.1 amps at peak capacity, so this arrangement only worked when it was fully charged. As soon as the battery was drawn down a bit, the Pi was not getting enough current to operate (around 80-100mA), so the camera ceased to work. The solution was to use a separate battery pack for the light.

Even after solving this and other technical problems, like running out of space on the Pi’s SD card, and figuring out the right cron / shell script configuration for timelapse images, a fundamental problem remained: infrared light doesn’t travel well underwater, perhaps because it is at the low end of the light spectrum, meaning it has low energy. Therefore, there wasn’t much to see in the middle of the night in the images that crepuscle produced. I schemed about how to make the most of these initially disappointing results.

At first, all the images seemed completely black. However, when I took a look at the histogram for a random image in the free image editing software GIMP, I noticed that there was some image data in the very low wavelengths. I experimented with bumping up the color curves so this information was more visible, and was pleased with the somewhat psychedelic effect.

histogram of underwater night image

I then applied this curve to each image with a command line batch process using ImageMagick, then compiled the images into videos using ffmpeg.

Overall, this project was a great learning experience. I learned about the physics of light and water, efficient and appropriate use of batteries in electronics, batch image processing using open source software, and how to use local found materials like bamboo and cement blocks.

Thanks to Andy QuitmeyerSid DrmayRob FaludiJosh Michaels and everyone else who helped out. Thanks also to the Oregon Arts Commission for their financial support which made this project and experience possible.

materials

  • Raspberry Pi Zero W
  • Lewis N. Clark WaterSeals hard case
  • Raspberry Pi NoIR camera
  • 2 packets of silica gel
  • SparkFun Buck Boost
  • infrared flashlight
  • Anker PowerCore 10,000mAh power bank
  • USB to micro USB cable
  • 100 ft of paracord
  • 1 ft length of bamboo
  • cement block
  • zip ties
  • solder
  • wires
  • 4 rechargeable AAA batteries
  • battery charger
  • AAA battery pack
  • Aquarian H2A-XLR hydrophone and Zoom H4n audio recorder (for frog audio recordings)

Audio Synthesis of the Túngara Frog Call

Before the sun had even set on my first day in Gamboa I had already heard excited chattering about the sound of the “Laser Frogs”. Once it got dark there was a seemingly ubiquitous chorus of these laser sounds, an asynchronous melange of descending glissandi. One might mistake this biophony for a retro video-game arcade, but it is in fact the revelry of an amphibious Bacchanalia.

Túngara Frog in a puddle, photo courtesy of Mangtronix
Chorus of Tungara frogs at night in Gamboa
Spectrogram of the frog chorus

First Attempt

I had other plans and project ideas before arriving at DINACON, but I found myself continuously drawn to the sound of these frogs. I was completely ignorant of them at first, having no idea what their actual name was or anything about their behavior or even what they looked like. I just really liked the way they sounded and kept listening. Indeed these frogs sound like a laser beam from a video game, and since I have worked as a sound designer and synthesized laser beam sounds for video games, I thought “I bet I can synthesize these frogs!”.

My first attempt was a very quick patch using the ES2 synthesizer in Logic Pro. I did this based entirely on listening to the frogs before analyzing the spectrogram in detail. It captured the general gesture of the descending tone, but didn’t capture the timbre or slope of the glissando very well.

ES2 Logic Pro Patch for Laser Frog Synthesis
Lazer Frog Synth attempt #1

Making the Whine

Although the first attempt was not convincing enough, it was close enough to encourage me to continue on my quest to synthesize the frogs call. I began by inspecting an isolated call from one frog via the spectrogram in Audacity.

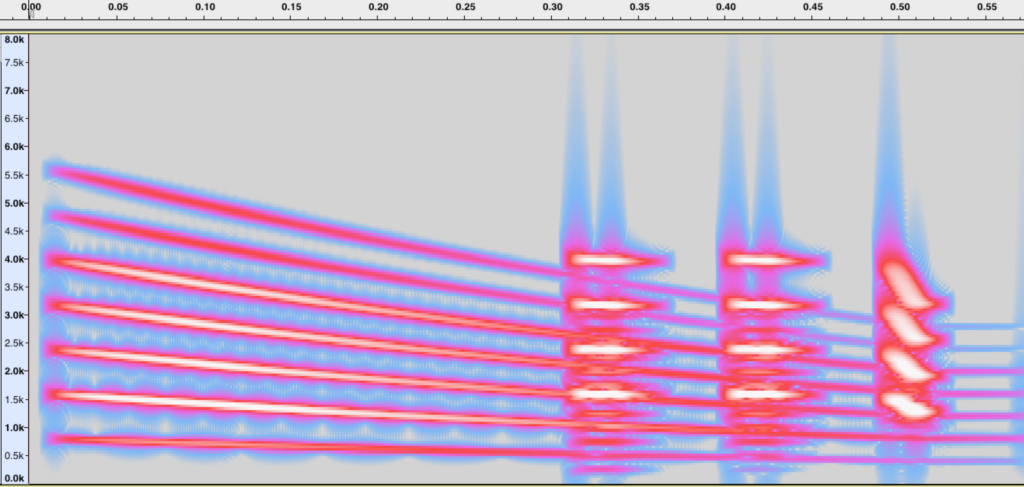
Túngara frog recording with whine and three chucks
Spectrogram of Túngara frog recording with whine and three chucks

There are many noticeable things from this spectrogram that further inform what we hear. The first being that the frogs make not only this “laser” sound, but also have a percussive sound that follows it. At first I referred to these components as the “chirp” and “beep”, but after being clued in by some STRI researchers (thanks Amanda Savage!) I learned to use the terms “whine” and “chuck”. These are much better descriptions in my opinion.

I decided to use the SuperCollider programming language so that I had absolute control over the synthesis of this sound. The first area of focus was on creating a convincing “whine” using a bank of sine wave oscillators.

Looking at the spectrogram above we can see the “whine” portion of the call is a descending tone, starting around 1kHz and ending about an octave below. It also appears to have some harmonic overtones that decrease in intensity (up to about the 5th harmonic) Here is a recording and spectrogram of the first attempt in SuperCollider.

Túngara “whine” synthesized, first attempt in SuperCollider
Spectrogram of synthesized Túngara whine in SuperCollider

This was already sounding better, but by looking at the spectrogram of the synthetic whine some things are obviously still lacking. First, the slope of the glissando is still too linear, it needs to have more on a exponential (perhaps cubic?) curve to it. Additionally the upper harmonics are too strong and need to be attenuated relative to their ordinality. (The higher the harmonic, the less loud it is)

Making the Chuck

After a few more iterations of refining the whine, I moved onto the chuck.

Spectrogram of Túngara frog chucks.

Looking at the chucks in the above spectrogram we can see partials at relatively even spacing. We could perhaps model this by using a harmonic tone with a fundamental frequency of ~200 Hz or ~250 Hz, with the fundamental and first few overtones missing. The chucks seem to have their highest peak around 2.75 kHz. Is this sound produced via some sort of formant resonance? What mechanism makes it seemingly harmonic but with a missing fundamental? This is unclear to me, but I can recreate the sound nonetheless!

This group of three chucks have different durations, and the last one seems to have a downward pitch contour but not nearly as pronounced as the whine. The first two beeps are approximately 50 milliseconds long, and the third is 40ms.

Using the same approach as the whine, I used a bank of sine wave oscillators to recreate the chuck. Below is a recording and spectrogram along with the synthetic whine.

Synthetic whine and chuck of Túngara frog
Recording of synthetic whine and chuck of Túngara frog

While the timing of the chucks is accurate, the tone is not convincing. I continued to iterate on the implementation until settling on the one below.

SuperCollider GUI Application

For presentation at Dinalab I put together a simple GUI application which allows the user to playback a recording of an isolated Túngara call and compare it to the synthetic whine and chuck. Additionally there are knobs to alter the pitch of both the whine and chuck to hear what GIANT or tiny Túngara frog might sound like.

Video of Tungara Frog Synth SuperCollider GUI Application

Here is the audio of the final form the synthesizer took, there is still room for improvement of course.

Version 6 of Túngara frog synthesizer

Playback in the Field

In order to see if my synthesizer was effective at blending in with Túngara frogs in the field, I did some simple, not very well controlled tests on the streets of Gamboa.

Basically, I walked up to a pond where I heard Túngara frogs calling and they would usually stop calling as I approached. Then with my field recorder running I would play the synthesized call from my cell phone and wait to hear a response.

Here is the first trial (that loud percussive sound in the background is a Gladiator frog, I think) The synth is mostly in the left channel while the other frogs are mostly in the right.

Field test 1 of Túngara frog synthesizer

After shuffling around a bit, the frogs got quiet and I tried again.

Field test 2 of Túngara frog synthesizer

Now, can I conclusively say that the frogs responded to my call? I do not know, I am not a field biologist or experienced with phonotaxis studies, but the results of these simple tests seem promising. I think the frogs are buying my synthetic call.

Future Work

I really enjoyed working on this project and am very interested in improving the audio synthesis and application interface so that it is useful to researchers both in the field and the laboratory. If you study frogs, bioacoustics, phonotaxis or have interest in this project please get in touch with me, I would love more feedback.

From my perspective, the synthesis could still use some refinement. First, it could use better filtering of the whine, perhaps via a resonant filter based on accurate resonances of the frogs vocal apparatus? Additionally, more variability in chuck production would be useful. With more analysis of recordings and a bit more reading on the physiology of the chuck production I think I could better refine the synthesis.

Some final questions:

Perhaps I should port this synthesizer for use in a web/mobile app?

Maybe I could synthesize Gladiator (or other) frog calls?

What additional features would be useful?

Do you have comments, criticisms or any feedback?

Acknowledgments

First I would like to thank all the participants I met at Dinacon, and Dr. Andrew Quitmeyer for organizing the event.

Amanda Savage was very generous in talking with me about my project and in introducing me to the vast literature and research available on Túngara frogs.

References and Further Reading

Quick Guide – Túngara Frogs, Rachel A. Page and Ximena E. Bernal

The Túngara Frog: A Study in Sexual Selection and Communication, Michael J. Ryan

Complex Call Production in the Túngara Frog, M. Gridi-Papp

Unlucky túngaras

There are many, many more papers written about these frogs. They are certainly one of the most studied frogs in documented human history.

-Phillip Hermans
Very Good Listening

www.verygoodlistening.com